
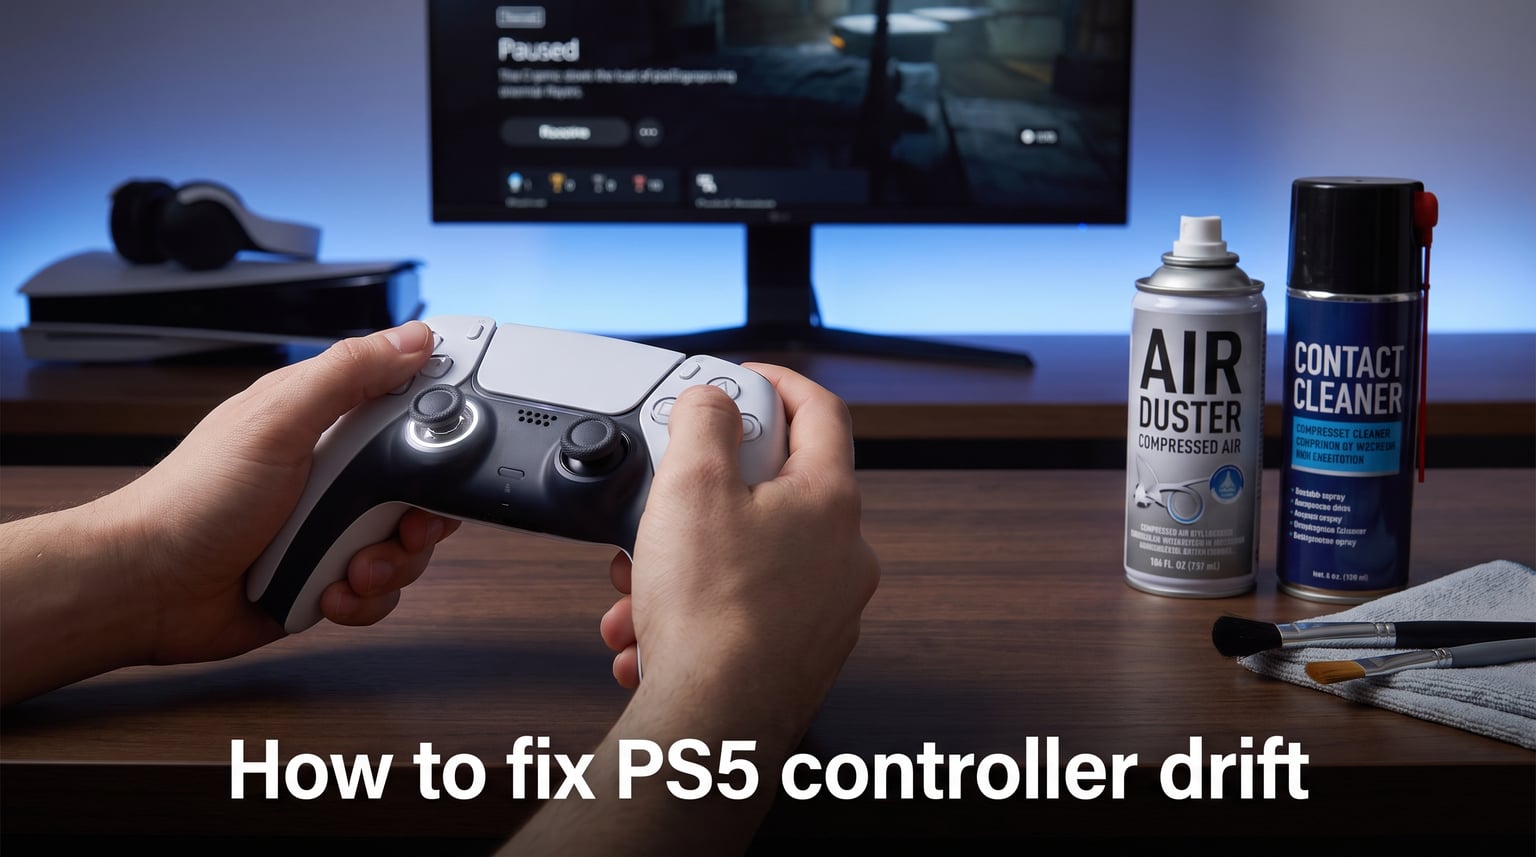
If your character starts creeping forward when your hands are off the sticks, you are dealing with PS5 controller drift. It is one of the most frustrating hardware issues a gamer can face, and the DualSense controller is no stranger to it. Our team has tested and documented every fix from simple software resets to full teardowns, and this guide walks through all of them.
Learning how to fix PS5 controller drift can save you $70 or more on a replacement. Most drift issues are fixable at home using methods that take anywhere from 2 minutes to 30 minutes. We will start with the fastest no-tool solutions and work up to advanced repairs.
You do not need technical experience for most of these fixes. By the end of this guide, you will know exactly what is causing your drift, how to fix it, and how to prevent it from coming back.
What Is PS5 Controller Stick Drift?
PS5 controller stick drift happens when your DualSense analog sticks register movement even when you are not touching them. Your character might walk on its own, your camera might slowly pan, or your aim might pull to one side during gameplay.
These unwanted movements are called phantom inputs. They happen because the sensors inside the analog stick mechanism are sending incorrect signals to the controller’s processor. The PS5 interprets these signals as real stick movement.
Drift is most noticeable in first-person shooters where precise aiming matters, racing games where constant steering correction is required, and platformers where any unintended movement can send you off a ledge. Even mild drift makes competitive online play nearly impossible.
The good news is that stick drift is a well-understood problem with a clear set of solutions. Most cases fall into one of four categories: debris interference, sensor wear, physical damage, or software glitches. The fix depends on which category your controller falls into.
Why PS5 Controllers Drift: Common Causes
Understanding the root cause of your drift helps you choose the right fix. Here are the four primary reasons DualSense controllers develop drift.
Dust and Debris Buildup
The most common cause of PS5 stick drift is dust, dirt, and grime working its way inside the analog stick mechanism. Every time you play, tiny particles from your fingers, the air, and the surrounding environment settle around the stick base.
Over time, this debris accumulates on the potentiometer contacts inside the controller. The potentiometer is the component that measures stick position by reading electrical resistance across a carbon track. When debris lands on this track, it disrupts the electrical signal and causes the controller to misread the stick position.
This type of drift usually develops gradually. You might notice a slight pull at first that gets worse over days or weeks. It is also the easiest type of drift to fix because a thorough cleaning often restores normal function.
Potentiometer Wear Over Time
The potentiometers inside your DualSense controller have a physical lifespan. Each potentiometer contains a carbon film track that a small contact wiper slides across as you move the stick. Every movement wears this carbon track slightly.
After months or years of regular use, the carbon track develops uneven spots, thin areas, and grooves. The contact wiper can no longer read consistent resistance values, and the controller starts registering phantom inputs. This is the same wear pattern that affects every controller using potentiometer-based analog sticks.
Typical lifespan for DualSense potentiometers ranges from 400 to 500 hours of active gameplay under normal conditions. Heavy use, especially in games that require constant stick movement like Call of Duty or FIFA, can accelerate this wear significantly.
Wear-based drift is harder to fix with cleaning alone. If the carbon track is physically degraded, you may need to replace the potentiometer or the entire analog stick module.
Physical Damage From Drops or Impact
Dropping your controller even once can cause immediate drift. The analog stick mechanism is precise but delicate, and impact can bend the stick shaft, dislodge internal components, or crack the potentiometer housing.
Sometimes the damage is not immediately obvious. You might drop the controller and notice nothing wrong for a week before drift appears. This delay happens because the initial impact loosens a component that gradually shifts further with continued use.
If your drift started right after a drop or impact, cleaning alone will not solve the problem. You likely need to replace the damaged analog stick module or seek professional repair.
Software and Firmware Glitches
Not all drift is caused by hardware. Sometimes the communication between the controller and the PS5 console gets corrupted, causing the system to misinterpret stick signals. This can happen after system updates, controller pairing issues, or software conflicts.
Software-related drift often appears suddenly without any physical cause. It may affect both sticks simultaneously, which is unusual for hardware-based drift. You might also notice other glitches like unresponsive buttons or delayed inputs.
The fix for software drift is simpler than hardware fixes. A controller reset, firmware update, or profile deletion typically resolves the issue in under five minutes.
How to Fix PS5 Controller Drift: Quick Fixes (No Tools Required)
Start with these quick fixes before moving on to cleaning or disassembly. They require no tools and take less than 10 minutes combined. Many drift cases are caused by software glitches that these steps resolve immediately.
Step 1: Reset Your DualSense Controller
The controller reset clears temporary data and recalibrates the analog sticks to their factory center position. This is the single most effective quick fix for software-related drift.
Look at the back of your DualSense controller. You will find a small hole next to the L2 button. This is the reset button.
Use a straightened paperclip or a SIM ejector tool to press and hold the button inside this hole for 5 seconds. The controller will power off.
Connect the controller to your PS5 using a USB-C cable. Press the PS button to pair it again. Test the sticks in a game or in the controller settings menu to see if the drift is gone.
Step 2: Update Controller Firmware
Sony releases firmware updates for the DualSense that can address drift-related bugs and improve sensor calibration. Outdated firmware is a known cause of phantom inputs.
Connect your controller to the PS5 with a USB-C cable. Go to Settings, then Accessories, then Controllers, then Communication Method. Select “Use USB Cable.”
If a firmware update is available, the PS5 will prompt you automatically. Follow the on-screen instructions and do not disconnect the controller during the update process. After the update completes, test your sticks for drift.
Step 3: Delete and Re-Pair the Controller Profile
Sometimes the controller profile stored on your PS5 becomes corrupted, leading to incorrect stick readings. Deleting this profile forces the system to create a fresh one.
Go to Settings, then Accessories, then Controllers on your PS5. Navigate to the controller you want to fix. Select “Delete” to remove the existing profile.
Connect the controller via USB-C and press the PS button. The PS5 will create a new controller profile with default calibration settings. This method has been reported by Reddit users on r/PS5 and r/DualSense as an effective fix for software-based drift.
Step 4: Manual Stick Manipulation Technique
This technique has been shared widely across gaming forums as a quick fix for mild drift. It works by redistributing debris inside the potentiometer and re-centering the contact wiper.
Press and hold the affected analog stick down (clicking L3 or R3). While holding, slowly rotate the stick in a full clockwise circle 10 times. Then rotate counterclockwise 10 times.
Release the stick and wait 5 seconds. Repeat the process 2 to 3 times. This gentle pressure can dislodge debris from the potentiometer contacts and temporarily restore normal readings.
Forum users report this fix works best for mild to moderate drift caused by debris. If your drift returns quickly after this technique, you likely need a deeper cleaning.
Cleaning Methods: Fixing Drift With Basic Tools
If the quick fixes did not solve your drift, the next step is cleaning. Dust and debris trapped inside the analog stick mechanism are the most common drift cause, and a proper cleaning resolves it in the majority of cases.
Tools You Will Need
Here is what you need for the cleaning methods below. You may already have most of these at home.
Compressed air can (or a bulb air blower)
Isopropyl alcohol (90% or higher concentration)
Cotton swabs (Q-tips)
Contact cleaner spray (WD-40 Specialist Contact Cleaner is widely recommended by forum users)
Clean microfiber cloth
Toothpick (for gentle debris removal)
Compressed Air Cleaning Method
This is the gentlest cleaning method and should be your first attempt. It works by blowing loose debris out of the analog stick mechanism without any liquid.
Turn off your PS5 controller completely. Hold the controller upside down so gravity helps dislodge debris.
Insert the compressed air straw nozzle into the gap around the base of the analog stick. Angle it toward the center of the stick mechanism.
Spray short 1-second bursts while slowly rotating the stick in full circles. Do this for about 10 seconds per stick. The rotating motion ensures the air reaches all sides of the potentiometer housing.
Wait 2 minutes for any moisture from the compressed air to evaporate completely. Turn the controller on and test for drift. Repeat the process up to 3 times if drift persists.
Do not shake the compressed air can before use. Shaking introduces liquid propellant that can damage the electronics. Keep the can upright while spraying.
Isopropyl Alcohol Cleaning Method
If compressed air alone does not fix the drift, isopropyl alcohol can dissolve grime that air cannot dislodge. This method reaches deeper into the potentiometer mechanism.
Turn off the controller and disconnect it from the PS5. Dip a cotton swab in 90% or higher isopropyl alcohol. Squeeze out excess liquid so the swab is damp but not dripping.
Lift the rubber thumb pad off the analog stick to expose the stick shaft and base. This gives you better access to the gap where debris accumulates.
Run the damp swab around the base of the stick, focusing on the gap between the stick shaft and the controller housing. Rotate the stick slowly while cleaning so the swab reaches all sides.
Apply a small amount of alcohol directly into the gap around the stick base. Rotate the stick in full circles 10 to 15 times to distribute the alcohol inside the potentiometer.
Wait 15 to 20 minutes for the alcohol to evaporate completely before turning the controller on. Isopropyl alcohol dries quickly, but the internal components need time to air out fully. Test the sticks after drying.
Contact Cleaner Spray Method
Contact cleaner is specifically designed to clean electrical contacts and potentiometers. Forum users on Reddit consistently recommend WD-40 Specialist Contact Cleaner as the most effective product for PS5 controller drift.
Contact cleaner works by dissolving oxidation, grime, and conductive debris on the potentiometer carbon track. It also leaves a thin protective film that helps prevent future buildup.
Turn off the controller. Lift the rubber thumb pad off the affected stick. Spray a very short half-second burst of contact cleaner directly into the gap around the stick base.
Immediately rotate the stick in full clockwise circles for 10 to 15 seconds. Then rotate counterclockwise for another 10 to 15 seconds. The rotating motion spreads the cleaner across the entire potentiometer surface.
Wait 5 to 10 minutes for the contact cleaner to evaporate. The solvents in contact cleaner dry fast and leave no residue. Test the controller for drift.
Use contact cleaner sparingly. One or two short bursts per stick is sufficient. Over-spraying can cause the liquid to pool inside the controller and reach other components.
Never use regular WD-40 (the blue can multi-purpose lubricant) on your controller. It leaves an oily residue that attracts more dust and permanently damages potentiometers. Only use WD-40 Specialist Contact Cleaner, which is a different product designed for electronics.
Advanced Troubleshooting: Disassembly and Deep Clean
If all the above methods fail, your drift is likely caused by deep contamination or potentiometer wear that requires internal access. Disassembling the DualSense controller lets you clean the potentiometers directly or replace worn components.
Before proceeding, read the warranty warning below carefully. Opening your controller may void your warranty.
Warranty Warning
If your DualSense controller is still under warranty (typically 1 year from purchase), contact Sony support before opening it. Sony may repair or replace drift-affected controllers for free under warranty. Disassembling the controller yourself will void this coverage.
In some regions, consumer protection laws require manufacturers to cover hardware defects beyond the standard warranty period. Check your local regulations before giving up on a warranty claim.
Tools Needed for Disassembly
The DualSense controller uses specific screw types. Here is what you need to open it safely.
Phillips PH00 screwdriver
Torque T8H screwdriver (for internal screws)
Plastic spudger or opening tool
Tweezers
Isopropyl alcohol (90% or higher)
Cotton swabs
Small tray for screws (there are many small parts)
Step-by-Step Disassembly Guide
Step 1: Remove the four screws on the back of the controller using the PH00 screwdriver. Two screws are visible at the top near the L2 and R2 triggers. Two more are at the bottom near the USB-C port and in the center lower area.
Step 2: Use the plastic spudger to carefully separate the back panel from the front shell. Start at the seam near the grips and work your way around. There are plastic clips holding the halves together, so be gentle to avoid breaking them.
Step 3: Once the back panel is off, you will see the battery and the internal frame. Disconnect the battery connector carefully using the spudger. Set the battery aside.
Step 4: Remove the screws holding the internal frame to the front shell using the T8H screwdriver. There are typically 4 to 6 screws depending on the controller revision.
Step 5: Lift the circuit board assembly out of the front shell. The analog stick modules are attached to the circuit board. You now have direct access to the potentiometers on each stick module.
Cleaning Potentiometers Directly
With the controller disassembled, you can clean the potentiometers with precision. The potentiometers are small rectangular boxes attached to the side of each analog stick module. Each stick has two potentiometers, one for horizontal movement and one for vertical movement.
Dip a cotton swab in isopropyl alcohol. Gently clean the exterior of each potentiometer box to remove surface grime. Then apply a single drop of alcohol into the small opening on the side of each potentiometer.
Rotate the stick slowly 10 times in each direction to distribute the alcohol across the internal carbon track. The alcohol dissolves accumulated debris and oxidation inside the potentiometer.
Let the potentiometers dry for 15 minutes. Do not reassemble the controller until the alcohol has fully evaporated. Test the sticks while the controller is still open by connecting the battery and powering on.
Reassemble in reverse order: circuit board into front shell, internal frame screws, battery reconnection, back panel, and finally the four back screws. Test the controller thoroughly after reassembly.
Replacing the Analog Stick Module
If cleaning the potentiometers does not fix the drift, the carbon tracks may be permanently worn. In this case, you need to replace the analog stick module entirely.
Replacement DualSense analog stick modules are available online for approximately $10 to $15 per module. Look for modules that specifically list compatibility with the PS5 DualSense controller (model CFI-ZCT1W).
Desolder the old potentiometers from the circuit board using a soldering iron. The potentiometers are attached to small metal tabs that are soldered to the board. Heat each joint and lift the old potentiometer off.
Solder the new potentiometers in place. Make sure the orientation matches the original, with the wiper contacts facing the correct direction. Reassemble the controller and test.
If you are not comfortable with soldering, you can buy a complete replacement analog stick module that includes the potentiometers pre-installed. This simplifies the replacement but still requires soldering to connect the module to the circuit board.
For gamers without soldering experience, this is the point where professional repair or controller replacement becomes the more practical option.
How to Prevent PS5 Controller Drift
Prevention is always cheaper than repair. These habits will extend the life of your DualSense potentiometers and reduce the likelihood of drift developing.
Keep Your Controller Clean
Wipe your controller with a clean microfiber cloth after each gaming session. Pay special attention to the base of the analog sticks where dust and skin oils accumulate.
Wash your hands before playing. Oils, sweat, and food residue on your fingers transfer to the controller and work their way inside the stick mechanism over time.
Store your controller in a clean, dry place when not in use. Avoid leaving it on the floor, on dusty surfaces, or in direct sunlight. A controller case or storage shelf significantly reduces dust exposure.
Use Compressed Air Regularly
Even if your controller is not drifting yet, blow compressed air around the stick bases once every 2 weeks. This prevents debris from accumulating to the point where it causes drift.
Use short bursts and rotate the sticks while spraying. This maintenance routine takes under a minute and can add months or years to your controller’s lifespan.
Avoid Clicking L3 and R3 Aggressively
Pressing down on the analog sticks (L3 and R3 buttons) puts physical stress on the stick mechanism and potentiometers. In many games, L3 is used for sprinting and R3 for melee attacks, which means these actions happen frequently.
If your games allow it, remap sprint and melee to face buttons or the D-pad. This reduces physical wear on the stick mechanism and can extend potentiometer life significantly.
Maintain Controller Firmware
Check for firmware updates monthly. Sony periodically releases calibration improvements and bug fixes that keep stick readings accurate. Outdated firmware can slowly degrade over time as calibration data becomes stale.
Rotate Between Multiple Controllers
If you game frequently, owning two controllers and alternating between them halves the wear on each one. Each controller lasts longer because it gets recovery time between sessions. This strategy costs more upfront but saves money long-term compared to replacing worn-out controllers every few months.
When to Replace or Seek Professional Repair
Sometimes a controller has simply reached the end of its serviceable life. Here is how to decide between DIY repair, professional repair, and replacement.
Does Sony Fix Stick Drift for Free?
Sony’s standard warranty covers DualSense controllers for 1 year from the purchase date. If your controller develops drift within this period, Sony will repair or replace it at no cost. You need your original receipt or proof of purchase.
Contact PlayStation Support through their website or by phone to initiate a warranty claim. You will likely need to ship the controller to Sony’s repair center. The process typically takes 1 to 2 weeks.
Some regions have extended consumer protection laws that cover hardware defects beyond the 1-year manufacturer warranty. If you are outside the warranty window, it is still worth checking whether your region’s laws apply.
Professional Repair Options and Costs
Independent repair shops commonly fix DualSense drift. Search for “PS5 controller drift repair near me” to find local options. Most shops charge between $25 and $45 for analog stick replacement or potentiometer replacement.
Professional repair is a good option if your controller is out of warranty, you have tried cleaning without success, and you are not comfortable with soldering. The repair typically takes 1 to 3 days depending on the shop.
DIY vs Professional vs Replacement Cost Comparison
Here is a breakdown of what each option costs so you can make an informed decision about the best path forward.
DIY compressed air cleaning: $5 to $10 for a can of compressed air. Fixes debris-caused drift. Takes 5 minutes. Success rate is high for mild drift.
DIY contact cleaner cleaning: $10 to $15 for a can of WD-40 Specialist Contact Cleaner. Fixes oxidation and grime-caused drift. Takes 15 minutes. Success rate is high for moderate drift.
DIY potentiometer replacement: $10 to $15 for replacement parts plus $20 to $30 for a soldering iron if you do not have one. Fixes wear-caused drift. Takes 1 to 2 hours. Requires intermediate soldering skills.
Professional repair: $25 to $45 plus potential shipping costs. Fixes all types of drift including module replacement. Takes 1 to 3 days. No technical skill required.
Sony warranty repair: Free if under warranty. Takes 1 to 2 weeks. Only available for controllers within the warranty period.
New DualSense controller: $70 to $75 retail. Guaranteed fix. Takes immediate effect. Includes full warranty and fresh components.
Hall Effect Controller Alternatives
If you are tired of dealing with potentiometer-based drift, consider a controller with Hall effect sensors. Hall effect joysticks use magnetic fields instead of physical carbon tracks to measure stick position. Because there is no physical contact between moving parts, Hall effect sensors do not wear out and are essentially immune to drift.
Several third-party controllers for PS5 now use Hall effect sticks, including models from Nacon, Gulikit, and Flydigi. These controllers cost between $50 and $150 and eliminate drift as a recurring problem.
The trade-off is that some Hall effect controllers lack the DualSense signature adaptive triggers and haptic feedback. Read reviews carefully to find a model that balances drift resistance with the features you care about.
Frequently Asked Questions
Is stick drift actually fixable?
Yes, stick drift is fixable in most cases. The fix depends on the cause: software glitches respond to controller resets and firmware updates, debris-caused drift responds to cleaning with compressed air or contact cleaner, and wear-caused drift requires potentiometer or analog stick module replacement. Only controllers with severe physical damage from drops may be beyond repair.
Why do PS5 controllers get drift so easily?
PS5 controllers use potentiometer-based analog sticks, which rely on a physical contact wiper sliding across a carbon track. This design is prone to drift because dust and debris interfere with the electrical contacts, and the carbon track wears down with use. Heavy gaming sessions, dusty environments, and aggressive L3/R3 clicking all accelerate the wear process. Most DualSense controllers develop drift after 400 to 500 hours of use.
Does Sony fix stick drift for free?
Sony will fix stick drift for free if your DualSense controller is within the 1-year manufacturer warranty period. You need proof of purchase to make a claim. Contact PlayStation Support to arrange a repair or replacement. Outside the warranty period, Sony charges for repairs and you may be better off using an independent repair shop or buying a new controller.
Is stick drift fixable at home?
Yes, most PS5 controller drift is fixable at home. Start with a controller reset and firmware update, which take under 5 minutes and require no tools. If that does not work, clean the analog sticks with compressed air or contact cleaner spray. For advanced cases, you can disassemble the controller and clean or replace the potentiometers, though this requires a screwdriver set and basic soldering skills for replacement.
Can I fix PS5 controller drift without opening it?
Yes, you can fix most drift without opening the controller. Reset the controller using the pinhole button on the back, update the firmware, and clean the sticks with compressed air or contact cleaner sprayed into the gap around the stick base. These external methods resolve the majority of drift cases caused by debris and software glitches.
How long do PS5 controllers last before drift?
PS5 DualSense controllers typically last 400 to 500 hours of active gameplay before potentiometer wear causes drift. With regular cleaning and proper maintenance, you can extend this to 700 or more hours. Heavy use in games requiring constant stick movement, like FPS or sports games, will reduce the lifespan. Rotating between two controllers can effectively double the lifespan of each one.
Conclusion
Knowing how to fix PS5 controller drift puts you in control of your gaming experience and your wallet. Start with the quick fixes (reset, firmware update, profile deletion) since they take minutes and cost nothing. Move to cleaning methods (compressed air, isopropyl alcohol, contact cleaner) if the quick fixes do not work. Reserve disassembly and potentiometer replacement for cases where cleaning cannot reach the problem.
Most drift issues are solvable at home without spending more than $15 on supplies. If your controller is under warranty, always try Sony first since the repair is free. And if you are tired of dealing with recurring drift, a Hall effect controller eliminates the problem entirely.
Take care of your controller with regular cleaning and proper storage, and you will get hundreds more hours of drift-free gaming from your DualSense.