
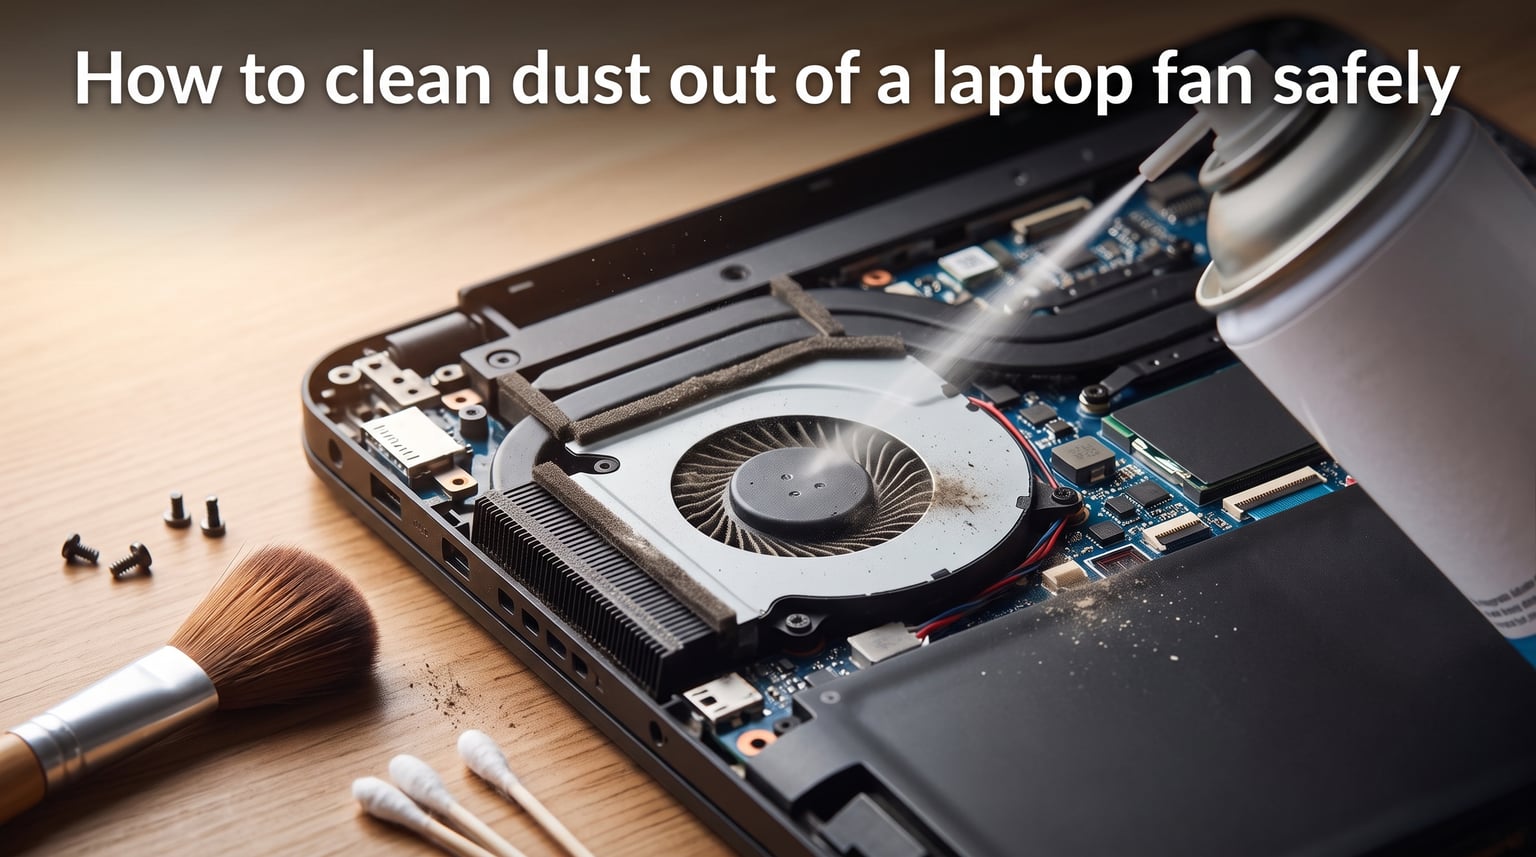
Is your laptop sounding like a jet engine every time you open a browser tab? That grinding, whirring noise is often the first sign of dust buildup choking your cooling system. I have seen laptops hit throttling temperatures of 95 degrees Celsius simply because nobody cleaned the fan in two years of use. Learning how to clean dust out of a laptop fan safely can add years to your machine’s lifespan and keep performance where it should be. In this guide, I will walk you through the exact methods, tools, and safety steps I use to keep laptops running cool and quiet.
Dust is not just a cosmetic problem inside your machine. It acts like a blanket over your heat sink and fan blades, trapping heat that your processor and graphics card desperately need to shed. When airflow gets restricted, your laptop compensates by spinning the fan faster and louder. Eventually, the thermal protection kicks in and slows everything down to prevent permanent hardware damage. This guide covers everything from a quick surface cleaning to deeper maintenance, so you can choose the right approach for your situation.
How to Clean Dust Out of a Laptop Fan Safely
Cleaning a laptop fan safely comes down to two core principles: cut all power before you start, and never let the fan blades spin freely while you work. You do not need expensive tools or technical expertise for the basic method. A can of compressed air and five minutes of patience can drop your laptop temperatures by 10 to 15 degrees Celsius, based on results reported by users across Reddit communities like r/GamingLaptops and r/laptops.
The process breaks into two main approaches depending on your comfort level. Surface cleaning uses compressed air through the vents without opening anything up. Deep cleaning involves removing the bottom panel to access the fan directly. I recommend starting with surface cleaning first, since it handles most dust issues and carries zero risk of damaging internal components.
Signs Your Laptop Fan Needs Cleaning
Your laptop gives you several warning signs before dust becomes a serious problem. The most obvious is fan noise. If the fan runs constantly at high speeds even during simple tasks like web browsing or watching a video, the cooling system is likely struggling against a dust blockage. A laptop that stays quiet during light use but sounds like a hair dryer under load probably just needs a basic cleaning.
Heat is the second signal. If the bottom of your laptop feels uncomfortably hot on your lap, or the keyboard area gets warm during normal use, restricted airflow is usually to blame. You can download free monitoring tools like HWMonitor or Core Temp to track your processor temperatures. Normal idle temperatures sit between 40 and 55 degrees Celsius for most laptops. If yours idles above 65 degrees, it is time to clean the fan.
Performance drops are the third warning sign. When a processor hits its thermal limit, it automatically reduces clock speeds to protect itself. This is called thermal throttling, and it makes everything feel sluggish. If your laptop used to run games or heavy applications smoothly but now stutters and lags, dust buildup could be the hidden culprit.
Tools You Need to Clean Your Laptop Fan
Here is what I keep in my laptop maintenance kit for fan cleaning:
Can of compressed air (the most important tool)
Small soft brush, like a clean paintbrush or makeup brush
Cotton swabs (Q-tips) for detailed blade cleaning
Isopropyl alcohol (90 percent or higher) for stubborn grime
Microfiber cloth for wiping vent covers
Small Phillips screwdriver (only if doing a deep clean)
You probably already have most of these items around the house. The only thing you may need to pick up is compressed air, which costs just a few dollars at any office supply or electronics store.
Safety Precautions Before You Start
Safety comes first, and a few simple precautions will protect both you and your laptop from damage. Following these steps is what separates a safe cleaning from an expensive repair bill.
Shut down your laptop completely. Do not just put it to sleep or hibernate mode. Wait for the screen to go fully dark and all lights to stop flashing before moving on. Then unplug the power adapter from the wall and from your laptop. If your laptop has a removable battery, take it out. For laptops with internal batteries, hold the power button down for 15 seconds after shutting down to discharge residual power from the components.
Work in a well-ventilated area because compressed air kicks up fine dust particles that you do not want to breathe in. An outdoor table or a garage works well. Avoid doing this near food or in a carpeted room where static electricity can build up. Ground yourself by touching a metal object before handling any internal components if you plan to open the laptop.
One critical safety rule that many people miss: never let the fan spin freely while blowing compressed air. The air pressure can spin the fan blades far faster than their designed speed, which generates voltage that flows backward into the motherboard and can short out components. Always hold the fan still with a finger or a toothpick through the vent while you spray. I cannot stress this enough, as it is the most common way people accidentally damage their laptops during cleaning.
Finally, check your warranty status before opening anything. Opening the bottom panel of some laptops voids the warranty, especially on certain MacBook models and sealed ultrabooks. If your laptop is still under warranty and you are uncomfortable with deep cleaning, stick to the surface method or take it to an authorized service center.
Step-by-Step: Cleaning With Compressed Air
This is the method I recommend for most users. It requires no disassembly and handles the majority of dust problems effectively. Here is the exact process:
Step 1: Shut down your laptop completely, unplug it from power, and remove the battery if possible. Hold the power button for 15 seconds to discharge any remaining power in the system.
Step 2: Locate the exhaust vents on your laptop. These are usually on the sides or back edge, and you will feel warm air coming from them when the laptop is running. The intake vents are typically on the bottom panel and may have a small grille pattern that lets you see the fan underneath.
Step 3: Hold the can of compressed air upright. This matters because tilting the can more than 45 degrees can cause the liquid refrigerant to spray out, which can damage your components. Keep it straight up and down.
Step 4: Insert a toothpick or small plastic clip through the vent grille to hold the fan blades still. This prevents the compressed air from spinning the fan too fast and sending voltage back into the motherboard. Gently press against a blade until the fan will not rotate when you apply air.
Step 5: Spray short bursts of compressed air into the intake vents on the bottom of the laptop. Each burst should last about two seconds. Give the can a few seconds between bursts to maintain pressure and prevent the refrigerant from getting too cold. Work your way across all the intake vent openings.
Step 6: Move to the exhaust vents on the side or back. Spray short bursts in the opposite direction of normal airflow to push dust out rather than deeper into the laptop. You will see clouds of dust exit the vents if there is significant buildup.
Step 7: Use the extension straw that comes with most compressed air cans to reach deeper into the vent openings. Keep the straw at least one inch inside the vent and angle it toward the visible fan blades for maximum effect.
Step 8: Wipe the vent covers with a microfiber cloth to remove any dust that settled on the exterior surfaces. Let the laptop sit for five minutes to allow any moisture from the compressed air to evaporate completely before powering it back on.
How to Clean a Laptop Fan Without Compressed Air
Not everyone has compressed air on hand, and that is perfectly fine. You can achieve good results with items you already have at home. The key is using tools that are gentle enough to avoid damaging the fan blades while still being effective at removing dust.
The soft brush method works well for light to moderate dust buildup. Take a clean, dry paintbrush with soft bristles and gently sweep across the intake and exhaust vents. The bristles will pull dust out of the vent openings without forcing it deeper inside. Work in small circular motions and tap the brush occasionally to release accumulated dust. This method is especially popular among gaming laptop owners on Reddit who clean their machines frequently between deep cleaning sessions.
For stubborn dust stuck to fan blades, dip a cotton swab in isopropyl alcohol (90 percent or higher) and gently wipe each blade. The alcohol breaks down the sticky residue that holds dust clumps together, and it evaporates quickly without leaving moisture behind. This technique works best if you can see the fan through the vent grille and reach the blades with the swab. Use a dry swab afterward to pick up any loosened dust particles.
A vacuum cleaner with a small brush attachment can help remove dust from the vent openings, but use caution. Keep the vacuum at least an inch away from the vent surface and never insert the nozzle directly into the vent. The suction can pull on internal components or spin the fan too fast. A handheld vacuum on its lowest setting is the safest option if you choose this route.
Some users ask about using a toothbrush to clean laptop fans. A soft-bristled toothbrush can work for the exterior vent grilles, but it is not ideal for reaching internal fan blades through small vent openings. The bristles on most toothbrushes are slightly too stiff and can catch on delicate components if inserted too far. If you use a toothbrush, choose one labeled extra soft and stick to exterior surfaces only.
Brand-Specific Tips for Dell, Lenovo, and MacBook
Different laptop manufacturers design their cooling systems differently, and knowing the specifics of your brand can make cleaning easier and more effective. Here is what I have learned from working with the major brands over the years.
For Dell laptops, most XPS and Inspiron models have their intake vents on the bottom panel and exhaust vents on the hinge area. Dell laptops generally tolerate compressed air cleaning well. If you own a Dell G-series gaming laptop, you will likely need to clean more frequently due to the more powerful components generating more heat and attracting more airflow through the system.
Lenovo laptops deserve special attention because they are extremely popular and have some model-specific quirks. ThinkPad models typically have excellent cooling designs with accessible vents that clean easily with compressed air. Lenovo Legion gaming laptops, including the Legion 5 and 5 Pro, tend to accumulate dust faster because their powerful processors and graphics cards require heavy airflow. Many Legion owners on r/LenovoLegion report needing to clean their fans every three to four months compared to every six months for standard laptops.
MacBooks require a more cautious approach. Apple’s laptops are sealed units with tightly packed internals, and opening them yourself voids the warranty on most models. For MacBook Air and MacBook Pro models, I recommend sticking to surface cleaning through the rear vents with compressed air. If your MacBook is running hot and loud despite cleaning, take it to an Apple Store or authorized service provider. Apple can clean the internals professionally and check whether the thermal paste needs reapplication.
Gaming laptops in general need more frequent cleaning than ultrabooks or office laptops. Their high-performance processors and dedicated graphics cards run hotter, pull more air through the system, and therefore trap more dust. If you own a gaming laptop from ASUS, MSI, Acer, or Razer, plan to clean the fan every three months at minimum. Ultrabooks and thin-and-light laptops can usually go six months between cleanings under normal conditions.
How Often Should You Clean Your Laptop Fan
Cleaning frequency depends on your environment and how you use your laptop. Here is a practical guide I follow:
For standard office or home use on a desk with hard floors, cleaning every six months is usually sufficient. If you use your laptop on carpets, fabric couches, or bedding, the fibers and dust from those surfaces get pulled into the intake vents much faster. In that case, clean every three to four months. Households with pets that shed hair need to clean even more frequently, as pet fur can quickly clog vent openings and wrap around fan blades.
Gaming laptops and mobile workstations used for video editing, 3D rendering, or intense gaming sessions need cleaning every two to three months. The heavier thermal load means more fan activity, which pulls in more environmental dust. If you live in a particularly dusty climate or an area with construction nearby, check your vents monthly and clean as needed.
Watch for the warning signs between cleanings. If your fan starts getting louder, your laptop feels hotter than usual, or performance dips during tasks that used to run smoothly, it is probably time for another cleaning session.
Surface Cleaning vs Deep Cleaning: What Is the Difference
Understanding the difference between surface cleaning and deep cleaning helps you choose the right approach and know when to escalate. Surface cleaning means working through the external vents without opening the laptop case. You use compressed air, brushes, and swabs from the outside to remove dust from accessible areas. This method is safe, quick, takes about ten minutes, and handles roughly 70 percent of common dust problems. I recommend surface cleaning as your first line of defense every time.
Deep cleaning involves removing the bottom panel of your laptop to access the fan, heat sink, and internal vents directly. This method removes dust that has accumulated deep inside the cooling fins and around the fan motor. It is more thorough but requires a small Phillips screwdriver, patience, and some technical comfort. You will need to remove screws, gently disconnect the fan cable from the motherboard in some models, and carefully clean each component. Deep cleaning also gives you the opportunity to check and potentially replace the thermal paste on your processor, which degrades over time and contributes to overheating.
I recommend deep cleaning once a year for heavy-use laptops and once every two years for standard use. However, if your laptop is still under warranty, check the manufacturer’s policy before opening the case. Some brands allow user-initiated internal maintenance while others void the warranty for any unauthorized opening.
When to Seek Professional Cleaning Service
Sometimes cleaning alone will not solve the problem, and that is when you need to consider professional help. If you have thoroughly cleaned your fan and the laptop still overheats, the issue may be degraded thermal paste, a failing fan motor, or a damaged heat pipe. These issues require disassembly and component-level repairs that go beyond basic maintenance.
Take your laptop to a professional repair service if you notice any of these signs. The fan makes grinding or clicking noises even after cleaning, which indicates a worn bearing in the fan motor. The laptop shuts down randomly during use, which suggests the thermal protection is triggering at extreme temperatures. You have cleaned the fan thoroughly but temperatures have not improved at all, which points to thermal paste degradation on the processor.
If your laptop is still under warranty, always go through the manufacturer’s service channels. Opening sealed laptops yourself can void the warranty and leave you paying out of pocket for repairs that would have been covered. Most manufacturers offer cleaning and maintenance services either free or at a reasonable cost for warranty customers.
Finally, if you simply feel uncomfortable opening your laptop or using compressed air, there is no shame in taking it to a professional. A typical fan cleaning service costs between 40 and 80 dollars at most repair shops, and many technicians will also reapply thermal paste for an additional fee. That investment is worth it to protect a machine that may have cost over a thousand dollars.
Environmental Factors That Affect Dust Buildup
Your surroundings play a huge role in how fast dust accumulates inside your laptop. Understanding these factors helps you anticipate when cleaning will be needed and take preventive measures to reduce dust intake.
Homes with carpet collect significantly more dust than those with hard flooring. Every time you place your laptop on a carpeted surface, the intake vents pull in fibers and dust particles from the floor. If possible, use your laptop on a hard desk or a laptop stand to keep it away from dusty surfaces. Pet hair is another major contributor, especially in multi-pet households. The fine fur gets pulled into vents and wraps around fan blades, creating a mat that restricts rotation and airflow.
Smoking near your laptop also accelerates dust problems. Cigarette smoke leaves a sticky residue on internal components that grabs and holds dust particles much more aggressively than clean surfaces. This tar-coated dust is harder to remove and often requires isopropyl alcohol to break down. Humid environments can cause dust to clump and stick together, while very dry environments generate static that attracts dust to electronic components. Knowing your environmental factors helps you adjust your cleaning schedule accordingly.
FAQs
Can you clean a laptop fan without taking apart?
Yes, you can clean a laptop fan without opening the case by using compressed air through the external vents. Hold the fan still with a toothpick or clip to prevent overspeed, spray short bursts into the intake vents on the bottom, and direct air through the exhaust vents on the side. This surface cleaning method handles most dust problems effectively.
Is it safe to clean a laptop fan at home?
Yes, cleaning a laptop fan at home is safe when you follow proper precautions. Shut down and unplug the laptop completely, discharge residual power by holding the power button, and always hold the fan still while using compressed air. Work in a well-ventilated area and avoid opening the case if your laptop is under warranty.
Can dust build up spoil a laptop fan?
Yes, excessive dust buildup can damage a laptop fan over time. Dust forces the fan to work harder and spin longer to achieve the same cooling effect, which wears out the fan bearings faster. Restricted airflow also causes the processor to run hotter, which can lead to thermal throttling and permanent hardware damage if left unaddressed.
Can I clean my laptop fan with a toothbrush?
You can use a soft-bristled toothbrush to clean the exterior vent grilles of your laptop, but it should not be inserted deep into the vents. The bristles can catch on delicate internal components if pushed too far. For internal fan blades, use a cotton swab with isopropyl alcohol instead, which is gentler and more precise for detailed cleaning.
Conclusion
Knowing how to clean dust out of a laptop fan safely is one of the most valuable maintenance skills for any laptop owner. The process is straightforward: power down completely, hold the fan still, use short bursts of compressed air through the vents, and repeat every few months based on your environment. These simple steps can drop your temperatures by 10 to 15 degrees Celsius, silence that grinding fan noise, and extend the life of your machine by years. Start with surface cleaning, upgrade to deep cleaning when you feel comfortable, and never hesitate to seek professional help if cleaning alone does not solve the overheating. Your laptop works hard for you, so give its cooling system the attention it deserves.