
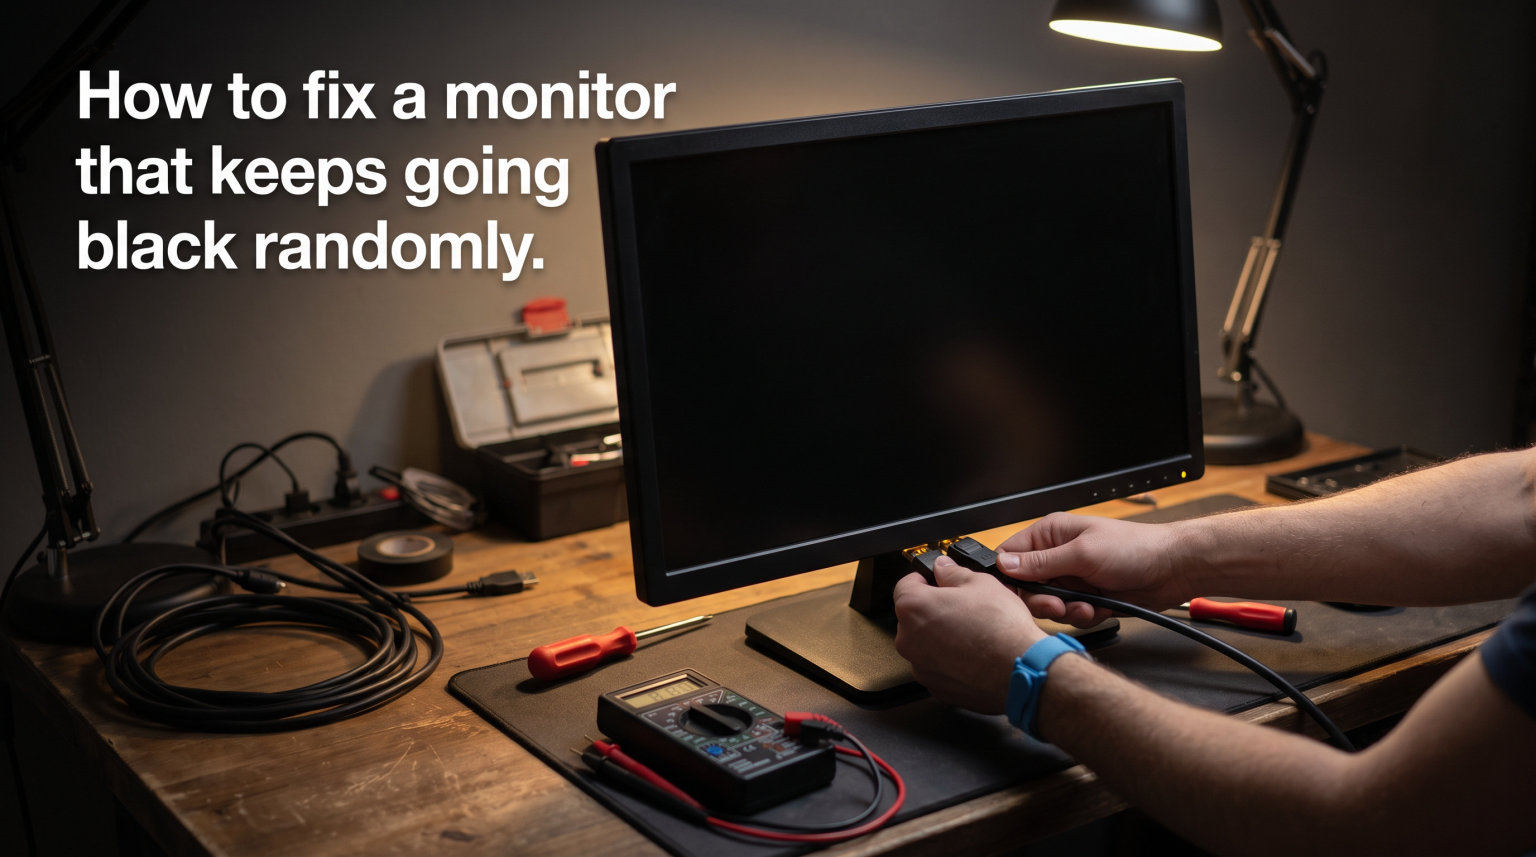
There is nothing more frustrating than being in the middle of work or a gaming session when your monitor screen goes black randomly for no apparent reason. Your computer keeps running, fans still spin, audio still plays, but the display just dies for a few seconds before coming back. If you have been searching for how to fix a monitor that keeps going black randomly, you are far from alone. Thousands of users deal with this exact problem every month.
I have spent years troubleshooting display issues across desktop PCs, laptops, gaming rigs, and console setups. Random monitor blackouts are one of the most common complaints I encounter, and the good news is that the vast majority of cases are fixable without buying new hardware. The key is knowing where to look and what order to test things in.
In this guide, I will walk you through every possible cause of random black screens and give you a step-by-step process to identify and fix the problem. We will cover cable issues, graphics driver crashes, display settings, Event Viewer diagnostics, Safe Mode testing, hardware isolation, gaming-specific problems, multi-monitor setups, and even console connections. By the end, you will have a clear action plan to stop your screen from going black.
Most random blackouts lasting 1 to 3 seconds are caused by display driver crashes that recover automatically. This is actually your operating system restarting the graphics driver after it stops responding. Longer blackouts or screens that never come back usually point to cable failures, power supply problems, or hardware defects. Knowing which scenario you fall into is the first step toward a fix.
What Causes a Monitor to Go Black Randomly?
A monitor that goes black randomly almost always falls into one of six categories: display driver crashes, cable problems, power supply issues, overheating, display setting mismatches, or hardware failure. Understanding which category your problem belongs to will save you hours of trial and error.
The most common culprit by far is a display driver crash. When your graphics driver stops responding, Windows attempts to recover it automatically through a process called Timeout Detection and Recovery (TDR). During this recovery, your screen goes black for 1 to 3 seconds. If you check Event Viewer after these blackouts, you will often see errors related to nvlddmkm (for NVIDIA cards) or amdkmdag (for AMD cards).
Cable problems are the second most common cause. HDMI and DisplayPort cables can fail intermittently, meaning they work most of the time but lose signal briefly when bumped, heated, or when electromagnetic interference spikes. A loose connection at either end produces identical symptoms to a driver crash. I have seen countless users replace graphics cards only to discover the real problem was a $10 cable.
Power supply issues can also cause random black screens. If your power supply unit is failing or underpowered, your GPU may not receive consistent voltage, causing momentary display drops. Similarly, a loose or damaged monitor power cable can cause the monitor itself to briefly shut off and restart. Forum users on Tom’s Hardware frequently report that simply replacing the power cable fixed blackouts that persisted for months.
Overheating is a major factor, especially during gaming. When your GPU temperature exceeds safe limits, it throttles performance or briefly shuts down the display to protect itself. If your black screens happen primarily during graphically intensive tasks, thermal throttling is a likely suspect. Monitoring your GPU temperatures can confirm this quickly.
Refresh rate mismatches and resolution conflicts between your GPU and monitor can cause signal drops. This is particularly common when connecting high refresh rate monitors to older GPUs, or when using adapters that do not support the full bandwidth your display requires. The HDMI handshake process, where the source and display negotiate the connection, can also fail intermittently.
Finally, genuine hardware failure is always a possibility. A failing GPU, a monitor with dying capacitors, or a damaged display port can all produce random black screens. The key to diagnosing hardware failure is testing components individually, which we will cover in Step 6.
Quick Fixes to Try First
Before diving into deep troubleshooting, try these quick fixes that resolve a surprising percentage of random black screen issues. I recommend going through these in order because they take only a few minutes each.
Keyboard shortcut reset: Press the Windows key + Ctrl + Shift + B simultaneously. This keyboard shortcut restarts your graphics driver immediately. You will hear a short beep and your screen will flash. This is the fastest way to recover from a black screen without rebooting.
Reseat all cables: Unplug and firmly reconnect both ends of your display cable (HDMI, DisplayPort, DVI, or VGA) and your monitor’s power cable. Make sure every connection is snug and secure. Loose cables are responsible for more random blackouts than any other single cause.
Try a different cable: Swap your current display cable for a new one. If you are using HDMI, try DisplayPort instead, or vice versa. This single test can rule out cable failure instantly. I keep spare cables on hand specifically for this purpose.
Power cycle everything: Turn off your PC, unplug the monitor from the wall, wait 60 seconds, then reconnect and restart. This clears residual charge in capacitors and resets the monitor’s internal state. It sounds too simple, but it works surprisingly often.
Test the monitor on another device: Connect your monitor to a different computer, laptop, or game console. If the black screen persists on another device, the problem is your monitor or its power cable. If it works fine on another device, the problem is your PC, GPU, or the cable.
Install pending Windows updates: Go to Settings, then Windows Update, and install any available updates. Microsoft regularly releases patches for known display driver compatibility issues. A simple update can resolve black screens caused by a Windows bug.
Disable hardware acceleration: If black screens happen primarily in your web browser or specific applications, disable hardware acceleration in those apps. In Chrome, go to Settings, System, and turn off hardware acceleration. In Discord, go to Settings, Advanced, and disable hardware acceleration.
Step 1: Check Your Cable Connections
Cable problems account for an estimated 80% of random monitor blackout issues, making this the single most important step. I cannot stress this enough: before you touch a single software setting, thoroughly inspect and test every cable in your display chain.
Start by powering off your PC and monitor. Unplug each cable completely, inspect the connectors for bent pins, corrosion, or physical damage. A bent pin inside an HDMI or DisplayPort connector can cause intermittent signal loss that looks exactly like a driver crash. If you see any damage, replace the cable immediately.
When reconnecting cables, push firmly until you feel the connector seat completely. DisplayPort cables have a locking mechanism that clicks into place. HDMI cables should have no visible gap between the connector and the port. VGA and DVI cables have screws that should be tightened finger-tight, not overly tight.
Cable quality matters more than most people realize. Cheap, poorly shielded cables are susceptible to electromagnetic interference from other devices, especially power cables running parallel to them. I recommend using cables that are certified for your specific resolution and refresh rate. For DisplayPort, look for VESA-certified cables. For HDMI, check that the cable is rated for the HDMI version your devices support.
Switch ports on your GPU if possible. Most graphics cards have multiple display outputs. If you are connected to HDMI port 1, try HDMI port 2, or switch to a DisplayPort output instead. A damaged port on your GPU can cause intermittent failures, and switching ports is a quick way to test this.
One often-overlooked issue is GPU sag. Heavy graphics cards can sag over time, putting stress on the cables connected to them. This stress can gradually loosen connections or damage ports. If your GPU is sagging, install a GPU support bracket to keep it level. Several Reddit users have reported that fixing GPU sag eliminated their random black screens entirely.
Keep display cables away from power cables whenever possible. If they must cross, try to have them cross at a 90-degree angle to minimize interference. Avoid bundling display cables tightly with power cables, as this increases the chance of signal degradation.
If you are using any adapters or dongles, such as DisplayPort to HDMI or USB-C to DisplayPort, these are common failure points. Test with a direct connection if possible, or try a different adapter. Cheap adapters are notorious for causing intermittent signal drops, especially at higher resolutions and refresh rates.
Step 2: Update or Roll Back Your Graphics Drivers
Graphics driver issues are the second most common cause of random monitor blackouts. The nvlddmkm error in Event Viewer, which corresponds to NVIDIA driver crashes, is so prevalent that entire forum threads are dedicated to it. AMD users experience the same issue under the amdkmdag driver name.
The fix depends on whether your current driver is outdated or recently updated. If you have not updated your driver in months, a simple update may resolve the issue. If the black screens started right after a driver update, rolling back to the previous version is your best bet.
How to Update NVIDIA Drivers
Open NVIDIA GeForce Experience or download the latest driver directly from the NVIDIA website. Run the installer and choose Custom installation, then check the box for a clean installation. This removes old driver files that can cause conflicts. After installation, restart your PC and test for black screens over the next few hours.
How to Update AMD Drivers
Open AMD Adrenalin software or download the latest driver from the AMD website. Run the installer with the Factory Reset option checked to ensure a clean install. AMD drivers occasionally introduce bugs that cause black screens, so check the release notes for any known display issues before installing.
How to Roll Back Your Driver
Right-click the Start button and open Device Manager. Expand Display adapters, right-click your GPU, and select Properties. Go to the Driver tab and click Roll Back Driver if the option is available. If it is grayed out, you will need to manually download and install an older driver version from the manufacturer’s website.
Using DDU for a Clean Install
When standard driver updates do not fix the problem, I recommend using Display Driver Uninstaller (DDU). This free tool completely removes all traces of your current graphics driver, including registry entries and leftover files that standard uninstallers miss. Download DDU from its official GitHub page, boot into Safe Mode, run DDU to remove your current driver, then install a fresh copy of the latest driver.
This clean install process resolves black screen issues that persist through normal driver updates because it eliminates corrupted driver files and conflicting remnants from previous installations. Many users on r/techsupport report that DDU fixed problems they had been struggling with for weeks.
Identifying nvlddmkm Errors
The nvlddmkm error specifically indicates that your NVIDIA display driver stopped responding and Windows attempted to recover it. Each time this happens, your screen goes black briefly. If this error appears frequently in your Event Viewer logs, the issue is definitely driver-related rather than hardware-related. Common fixes for nvlddmkm crashes include updating the driver, increasing the TDR delay in the Windows Registry, or underclocking your GPU slightly.
To increase the TDR delay, open Registry Editor and navigate to HKEY_LOCAL_MACHINESystemCurrentControlSetControlGraphicsDrivers. Create a new DWORD value named TdrDelay and set it to 8 (seconds). This gives the driver more time to respond before Windows forces a recovery, which can reduce black screen incidents.
Step 3: Adjust Your Display Settings
Incorrect display settings can cause your monitor to lose signal and go black, especially when the refresh rate or resolution exceeds what your cable or GPU can handle consistently. This is particularly common with high refresh rate monitors running at 144Hz or higher.
Right-click your desktop and select Display settings, then scroll down to Advanced display settings. Check the refresh rate setting for your monitor. If it is set to the maximum (for example, 165Hz), try lowering it to 144Hz or 120Hz to see if the black screens stop. Some monitors are unstable at their maximum refresh rate, and dropping even slightly can make a big difference.
Check that your resolution matches your monitor’s native resolution. Running at a non-native resolution forces the monitor to scale the image, which can occasionally cause signal processing delays that result in brief black screens. Always use the native resolution listed in your monitor’s specifications.
If you are using multiple monitors, check that each one is set to a refresh rate that its cable can support. A DisplayPort 1.2 cable can handle 144Hz at 1440p, but an HDMI 1.4 cable cannot. Mismatched cable capabilities and refresh rate settings cause frequent signal drops that look like random black screens.
Color depth settings can also cause issues. Some monitors struggle with 10-bit or 12-bit color depth over certain cable types. Try switching from 10-bit color to 8-bit color in your GPU control panel to see if the black screens stop. This is especially relevant for users with HDR monitors.
If you have G-Sync or FreeSync enabled, try disabling it temporarily. While these technologies reduce screen tearing, they can cause black screen issues on certain monitor and GPU combinations, especially when the refresh rate drops below the monitor’s VRR (Variable Refresh Rate) range. If disabling G-Sync or FreeSync stops the black screens, check for firmware updates for your monitor that may improve VRR stability.
Step 4: Use Event Viewer to Diagnose Driver Errors
Event Viewer is one of the most powerful diagnostic tools available in Windows, yet most troubleshooting guides barely mention it. If you want to know exactly what is causing your monitor to go black randomly, Event Viewer will tell you. I consider this step essential for anyone dealing with persistent black screen issues.
How to Open Event Viewer
Right-click the Start button and select Event Viewer, or press the Windows key and type Event Viewer. In the left pane, expand Windows Logs and click on System. This log records all system-level events, including display driver crashes.
Finding Display Driver Errors
Click Filter Current Log in the right pane and select Warning and Error levels. Look for events with source names like nvlddmkm (NVIDIA), amdkmdag (AMD), igfxCUIService (Intel), or Display. The event descriptions will tell you exactly what happened when your screen went black.
The most common error you will find is Event ID 4101, which reads something like “Display driver nvlddmkm stopped responding and has successfully recovered.” This confirms that your black screen was caused by a driver crash and automatic recovery. If you see this error frequently, your problem is driver-related and the solutions in Step 2 apply directly.
Event ID 4097 indicates that the display driver took too long to complete an operation. This is related to the TDR timeout and can often be fixed by increasing the TdrDelay registry value as described earlier.
Other Error Types to Look For
Look for Kernel-Power errors (Event ID 41), which indicate unexpected shutdowns or power state changes. If these correlate with your black screens, you may have a power supply problem rather than a display issue.
Check for WHEA (Windows Hardware Error Architecture) errors, which indicate hardware-level problems. If you see WHEA errors around the same time as your black screens, there may be a hardware fault in your GPU, motherboard, or RAM that requires physical component testing or replacement.
Take note of the timestamps on these errors. If every black screen corresponds to a driver crash event, you have confirmed the cause. If some black screens have no corresponding Event Viewer entry, the problem may be physical (cable, power, or monitor) rather than software-related.
Step 5: Boot Into Safe Mode for Deeper Testing
Safe Mode starts Windows with a minimal set of drivers and services, bypassing your normal graphics driver entirely. If your monitor stops going black in Safe Mode, you have confirmed that the problem is software-related, most likely your display driver.
How to Enter Safe Mode in Windows 10 and 11?
Open Settings, go to System, then Recovery. Under Advanced startup, click Restart now. When the restart menu appears, choose Troubleshoot, Advanced options, Startup Settings, and Restart. Press 4 or F4 to boot into Safe Mode, or 5 or F5 for Safe Mode with Networking.
Alternatively, hold the Shift key while clicking Restart from the Start menu to access the same advanced startup options.
What Safe Mode Tells You?
Use your computer normally in Safe Mode for 30 to 60 minutes. If the black screens stop entirely, your GPU hardware is fine, and the problem is caused by your graphics driver or another software conflict. This narrows your troubleshooting to driver updates, DDU clean installs, and software conflicts.
If the black screens continue even in Safe Mode, the problem is likely physical. Safe Mode uses a basic display driver, so if blackouts persist, the issue is with your cable, monitor, GPU hardware, or power supply rather than software.
Performing a Clean Boot
A clean boot is similar to Safe Mode but allows you to selectively enable services and startup programs to identify which specific application is causing conflicts. Press the Windows key + R, type msconfig, and press Enter. Under the Services tab, check Hide all Microsoft services, then click Disable all. Under the Startup tab, disable all startup items. Restart your PC.
If the black screens stop after a clean boot, re-enable services and startup items one by one, testing after each change, until the black screens return. The last item you enabled before the black screens returned is the culprit. Common offenders include overclocking utilities, RGB control software, and third-party antivirus programs.
Step 6: Isolate Hardware vs Software Issues
By this point, you have checked cables, updated drivers, adjusted settings, reviewed Event Viewer, and tested in Safe Mode. If the black screens persist, it is time to determine whether you are dealing with a hardware failure. This step uses a process of elimination to isolate the failing component.
Test With a Different Monitor
Connect your PC to a different monitor using the same cable. If the black screens stop, your original monitor may be failing. Monitor failures often start as brief blackouts before progressing to complete failure. Common monitor failure points include failing backlight inverters, dying capacitors in the power supply, and worn-out HDMI or DisplayPort ports on the monitor itself.
Test With a Different GPU Port
If your GPU has multiple output ports, try each one. A single damaged port can cause intermittent black screens while the other ports work fine. This is more common than you might expect, especially on older graphics cards where ports have been stressed by heavy cable connections over years of use.
The PS4/Console Testing Method
This is a technique I learned from forum discussions on Tom’s Hardware. Connect your monitor to a different device entirely, such as a PS4, Xbox, or even a streaming device. If the monitor goes black when connected to your console too, the monitor is definitely the problem. If the monitor works perfectly with the console, your PC or GPU is the suspect.
One user with an Asus ProArt PA249Q reported black screens that happened on both PC and PS4, confirming the issue was with the monitor itself. In that case, replacing the monitor’s power cable resolved the problem entirely. This cross-platform testing method is incredibly effective because it removes the PC from the equation completely.
Power Cable Replacement
Never underestimate the power cable. A damaged or low-quality power cable to your monitor can cause brief power interruptions that look exactly like display signal drops. Try using a different power cable, preferably a high-quality shielded one. This simple fix has resolved black screen issues for countless users who had already tried everything else.
When to Suspect GPU Failure
If you have tested multiple cables, multiple monitors, multiple ports, and multiple devices, and your PC’s display still goes black randomly, your GPU may be failing. Other signs of GPU failure include visual artifacts (colored squares, lines, or static on screen), fan speed fluctuations, and crashes during graphically intensive tasks. If your GPU is still under warranty, contact the manufacturer for an RMA.
Before declaring your GPU dead, try it in another PC if possible. Sometimes motherboard issues, insufficient power supply, or even overheating caused by poor case airflow can produce symptoms that look like GPU failure but are actually caused by other components.
Gaming-Specific Black Screen Issues
Many users experience black screens only during gaming, which points to a different set of causes than general-use blackouts. Gaming puts maximum stress on your GPU, power supply, and cooling system, amplifying any weaknesses in these components.
GPU overheating is the leading cause of gaming-related black screens. When your GPU temperature reaches its thermal limit (typically 83 to 90 degrees Celsius depending on the model), it will throttle performance and may briefly drop the display to protect itself. Download a temperature monitoring tool like HWMonitor or MSI Afterburner and watch your GPU temperature during gaming sessions.
If temperatures are too high, improve your case airflow by adding or repositioning case fans, cleaning dust from your GPU heatsink and fans, and ensuring your GPU is not starved for fresh air. Reapplying thermal paste to your GPU can also dramatically reduce temperatures, though this requires disassembling the GPU cooler.
Game-specific driver crashes can cause black screens in certain titles while everything else works fine. This usually indicates a compatibility issue between the game, your driver version, and your specific GPU model. Check the game’s community forums for known display issues and recommended driver versions. Sometimes an older driver performs better with a specific game than the latest version.
G-Sync and FreeSync can cause black screens during gaming, particularly when the frame rate drops below the monitor’s minimum VRR range. If your monitor’s VRR range is 48 to 144Hz and your game drops to 40 FPS, the VRR mechanism may fail momentarily, causing a black screen. Enable the LFC (Low Framerate Compensation) setting in your GPU control panel if available, or set a minimum refresh rate that prevents VRR from dropping out.
Overclocking your GPU or VRAM can cause instability that manifests as black screens during gaming. If you have applied any overclock, revert to stock clocks and test whether the black screens stop. Even factory overclocks on some GPU models can be unstable, and underclocking slightly has resolved black screen issues for many users.
Power supply limitations become apparent during gaming because the GPU draws maximum power. If your power supply is borderline for your GPU’s requirements, gaming loads can cause voltage drops that reset the display. Check that your power supply wattage exceeds your GPU manufacturer’s recommendation, and ensure you are using separate PCIe power cables rather than daisy-chaining a single cable.
Multi-Monitor and Laptop External Display Issues
Multi-monitor setups introduce additional complexity and additional failure points. When only one of your monitors keeps going black, the troubleshooting process differs from single-monitor black screen issues.
If your second monitor keeps going black while the primary display works fine, start by swapping the cables between monitors. If the problem follows the cable, replace it. If the problem stays with the same monitor, the monitor or its specific GPU port may be the issue.
Docking station users frequently experience random black screens on external monitors. USB-C and Thunderbolt docks can struggle with bandwidth limitations, especially when driving multiple high-resolution displays. Check that your dock firmware is up to date and that you are using the cable that came with the dock, as third-party cables may not support full bandwidth.
DisplayPort daisy-chaining, where you connect multiple monitors through a single DisplayPort output using Multi-Stream Transport (MST), is another common source of black screens. MST bandwidth is shared across all connected monitors, and pushing too many pixels through a single connection can cause signal drops. Reduce the number of daisy-chained monitors or lower the resolution and refresh rate on secondary displays.
Laptop users with external monitors should check their laptop’s power settings. Some power management profiles aggressively reduce power to USB-C and Thunderbolt ports to save battery, causing intermittent display drops. Go to Power Options, select High Performance mode, and disable USB selective suspend to prevent power-related display issues.
If you are connecting a laptop to an external monitor via HDMI and experiencing black screens, try a different HDMI port on the monitor and a different HDMI cable. Laptop HDMI outputs can be finicky, and some combinations of laptop, cable, and monitor simply do not play well together due to HDMI handshake timing differences.
Console (PS4/Xbox) Connection Black Screen Fixes
If you use your monitor with a gaming console like a PS4, PS5, or Xbox, you may encounter black screen issues that are specific to console connections. These issues are often related to HDMI handshake problems and HDCP (High-bandwidth Digital Content Protection) conflicts that do not affect PC connections.
PS4 HDMI handshake issues are a well-documented problem. The PS4 and your monitor negotiate the connection each time you switch inputs or power on, and this negotiation can fail intermittently, producing a black screen. To troubleshoot, power on your monitor first and wait for it to fully initialize, then power on your PS4. This gives the monitor time to be ready for the HDMI handshake.
If your PS4 displays a black screen after the initial logo, the issue may be a resolution mismatch. The PS4 may be outputting a resolution your monitor does not support. Boot the PS4 in Safe Mode by holding the power button until you hear a second beep, then select Change Resolution or Lower Resolution to 480p. Once you get a picture, set the resolution to one your monitor definitely supports.
HDCP issues can cause black screens when using HDMI splitters, switches, or capture cards between your console and monitor. HDCP is copy protection that verifies both devices are authorized to display protected content. If the authentication fails, the display goes black. Remove any intermediate devices and connect your console directly to the monitor to test.
Some older monitors do not fully support the HDMI version used by newer consoles, leading to intermittent black screens. The PS5 outputs via HDMI 2.1, and some HDMI 1.4 monitors struggle with the signal even when running at 1080p. Using a monitor with native HDMI 2.0 or 2.1 support eliminates this issue.
If your monitor goes black with both a PC and a console connected, the monitor is almost certainly the problem. Test the monitor with a third device if possible. If the black screens happen across all devices, contact the monitor manufacturer for warranty service or replacement.
When to Replace Your Monitor or GPU?
If you have exhausted every troubleshooting step in this guide and your monitor still goes black randomly, you may be facing hardware failure that requires replacement. Here are the signs that indicate it is time to replace a component rather than continue troubleshooting.
Replace your monitor if the black screens happen across multiple devices and cables, if you notice physical symptoms like flickering, buzzing sounds, or burning smells, or if the monitor takes increasingly long to turn on. Monitors typically last 5 to 10 years, and older units with failing backlights or capacitors are not worth repairing.
Replace your GPU if you see visual artifacts on screen, if the GPU fans behave erratically, if temperatures are unmanageable even after cleaning and reapplying thermal paste, or if the GPU causes crashes in every system you test it in. GPUs under warranty should be RMA’d rather than replaced at your own expense.
Before replacing anything, try borrowing a monitor and GPU from a friend for testing. This eliminates guesswork and ensures you are spending money on the right replacement. I have seen users buy new monitors only to discover their GPU was the problem, and vice versa.
Frequently Asked Questions
Why does my monitor keep blacking out randomly?
Random monitor blackouts are most commonly caused by display driver crashes, loose or faulty HDMI and DisplayPort cables, power supply issues, or GPU overheating. Check Event Viewer for nvlddmkm errors to confirm if the problem is driver-related. Reseat all cables and update your graphics driver as the first troubleshooting steps.
How to stop screen from randomly going black?
To stop your screen from going black randomly, first press Windows key plus Ctrl plus Shift plus B to restart your graphics driver. Then check all cable connections, update or roll back your graphics driver using DDU for a clean install, lower your monitor refresh rate slightly, and check Event Viewer for driver crash errors.
How to fix random black screens on PC?
Fix random black screens on PC by following these steps: 1) Reseat all display and power cables. 2) Try a different cable or port. 3) Update your graphics driver with a clean install using DDU. 4) Boot into Safe Mode to test if the issue is software-related. 5) Check Event Viewer for nvlddmkm or amdkmdag errors. 6) Test with a different monitor to isolate hardware failure.
Is the black screen of death fixable?
Yes, the black screen of death is fixable in most cases. The majority of random black screens are caused by driver crashes or cable issues, both of which are resolved by updating drivers, replacing cables, or adjusting display settings. Hardware failure accounts for a smaller percentage of cases and may require component replacement.
Why does my second monitor keep going black?
A second monitor going black while the primary display works fine usually indicates a cable issue, a faulty GPU port, or a bandwidth limitation. Swap the cables between monitors to test, try a different GPU port for the second monitor, and check that your display settings are not pushing more bandwidth than your cables or GPU can handle.
How do I check Event Viewer for display driver errors?
Open Event Viewer from the Start menu, expand Windows Logs, and click System. Filter for Warning and Error levels, then look for Event ID 4101 with source nvlddmkm (NVIDIA) or amdkmdag (AMD). These entries confirm display driver crashes that cause random black screens. Note the timestamps to correlate errors with your blackout incidents.
Conclusion
Learning how to fix a monitor that keeps going black randomly comes down to a systematic process of elimination. Start with the simple fixes like reseating cables and pressing the Windows key + Ctrl + Shift + B shortcut, then move through driver updates, display settings adjustments, Event Viewer diagnostics, Safe Mode testing, and hardware isolation in order. The vast majority of random black screen issues are resolved within the first three steps.
The biggest mistake I see people make is jumping straight to expensive solutions like buying a new GPU or monitor without testing cables and drivers first. Cable failures and driver crashes account for the overwhelming majority of random blackout cases, and both are fixable for free or for the cost of a new cable. Take the time to follow each step methodically before spending money on replacement parts.
If you have worked through every step in this guide and your monitor still goes black randomly, the most likely remaining causes are hardware failure in your GPU or monitor, or an underlying power supply problem. At that point, borrow components for testing or consult a professional technician who can run hardware diagnostics. Remember to check your warranty status before purchasing replacements, as many GPU and monitor failures are covered for 2 to 3 years after purchase.