
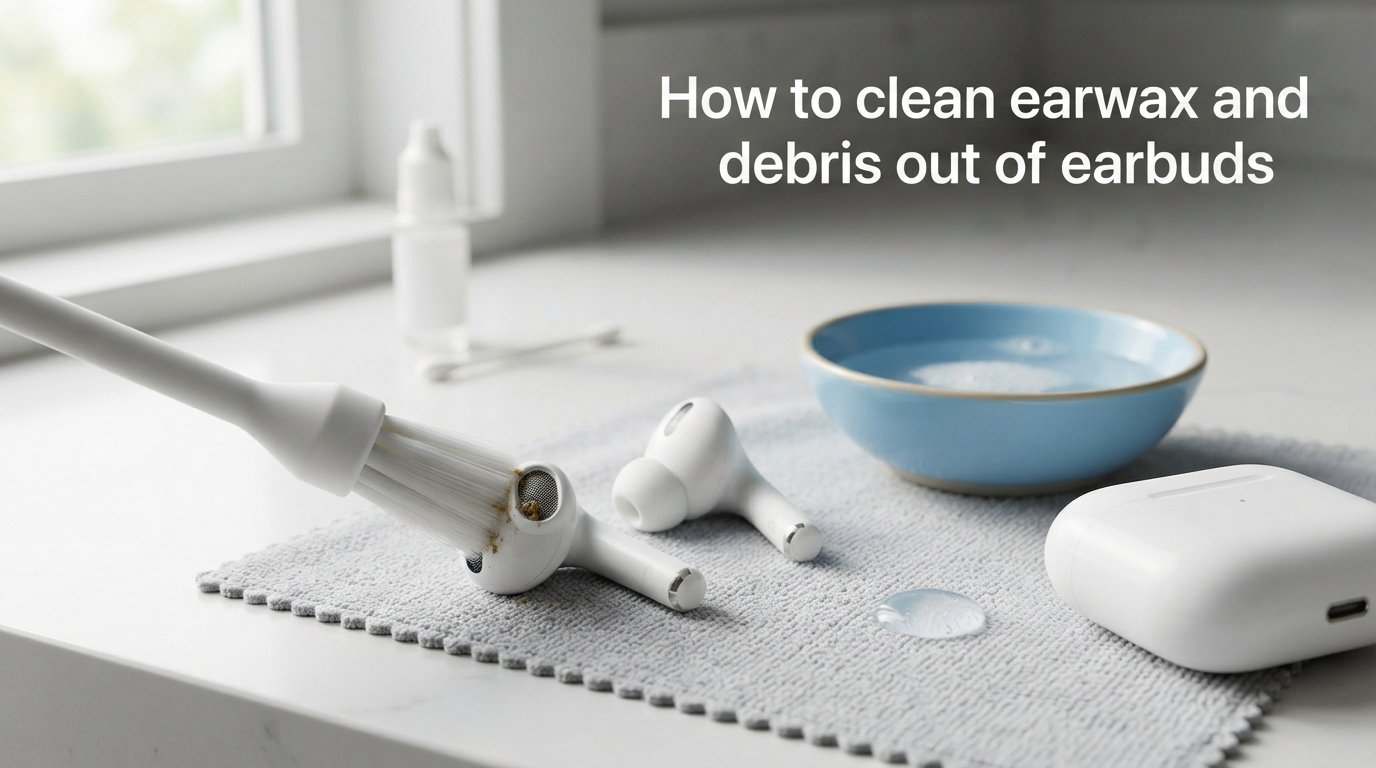
If you use earbuds every day, you probably already know they get gross fast. Learning how to clean earwax and debris out of earbuds is one of those small habits that pays off in better sound, healthier ears, and gear that lasts longer.
Every time you insert earbuds, they pick up earwax, skin oils, dust, and sweat. Over weeks and months, that buildup hardens into the mesh screen, muffles your audio, and creates a breeding ground for bacteria. A study referenced by audiologists found that in-ear earbuds can harbor thousands of times more bacteria than a kitchen sink.
The good news is that cleaning earbuds takes about five minutes once you know the right technique. This guide walks you through every step, from gathering the right tools to safely cleaning the delicate mesh screen without causing damage.
Whether you wear Apple AirPods Pro, Samsung Galaxy Buds, JBL earbuds, or generic wireless earbuds, the methods below apply to nearly all in-ear models with silicone tips and mesh grilles. We will also cover what NOT to do, because the most common cleaning mistakes are what actually ruin earbuds.
Why You Need to Clean Your Earbuds Regularly?
Dirty earbuds are not just an aesthetic problem. They can actively harm your ear health and degrade your listening experience in ways you might not notice until the damage is done.
The Bacteria Problem
Earbuds create a warm, dark, moist environment inside your ear canal. That is exactly the kind of place bacteria love to multiply. When you insert dirty earbuds repeatedly, you push bacteria deeper into your ear canal, which can lead to ear infections, itching, and skin irritation.
Research has shown that in-ear headphones can carry significantly more bacteria than a cutting board or even a kitchen sponge. People who share earbuds or never clean them are especially at risk. If you have ever experienced itchy ears after extended listening sessions, bacteria buildup is a likely culprit.
How Earwax Affects Sound Quality?
Earwax is the number one enemy of clear audio. When wax builds up on the mesh speaker grille, it acts like a physical barrier between the driver and your eardrum. The result is muffled, quiet, or distorted sound.
Many users assume their earbuds are dying when the real problem is a clogged mesh. I have seen Reddit threads where users reported their earbuds sounded brand new after a proper cleaning. One user noted that their left earbud had been noticeably quieter for weeks, and a thorough mesh cleaning restored it completely.
If one earbud sounds quieter than the other, check the mesh before assuming hardware failure. In most cases, an uneven wax buildup is the cause.
Long-Term Damage from Neglect
Beyond sound quality and hygiene, neglecting earbud cleaning shortens the lifespan of your gear. Wax and debris can work their way into the speaker driver housing, corrode charging contacts, and degrade the adhesives that hold the earbud together. Regular cleaning protects your investment.
What You Will Need to Clean Your Earbuds?
You do not need an expensive cleaning kit to get the job done. Most of these items are probably already in your home. Here is what to gather before you start:
Soft-bristled brush or a clean, dry toothbrush. This is your primary tool for loosening earwax from the mesh screen.
Cotton swabs (Q-tips or cotton buds). Use these for wiping down the earbud body and cleaning crevices. Do not poke them into the mesh.
Isopropyl alcohol 70%. Used sparingly on a cloth or swab for disinfection. Avoid higher concentrations.
Microfiber cloth or lint-free cloth. For wiping down exterior surfaces and drying components.
Disinfectant wipes. Optional but convenient for a quick weekly wipe-down.
3% hydrogen peroxide. Useful for softening hardened earwax on the mesh screen.
Painter’s tape or Blu Tack. Excellent for lifting stubborn wax and debris from the mesh without scraping.
Dental floss or a floss pick. The pointed end works well for gentle debris removal from tight crevices.
A clean, dry towel. For laying out parts and allowing everything to dry.
That is it. No special tools, no expensive kits. The key is using these items gently and in the right order.
How to Clean Earwax and Debris Out of Earbuds: Step by Step
Follow these steps in order for the safest, most effective cleaning. The entire process takes about 10 to 15 minutes.
Step 1: Wash Your Hands and Remove Silicone Tips
Start with clean, dry hands. You do not want to transfer oils or dirt onto freshly cleaned earbuds. Gently pull the silicone ear tips off each earbud. Most earbuds have tips that simply slide off with a gentle pull. Set them aside for separate cleaning.
If your earbuds have non-removable tips, skip this step and clean around them carefully.
Step 2: Dry Brush the Mesh Screen
Take your soft-bristled brush or clean toothbrush and hold the earbud with the mesh facing downward. Brush the mesh gently in small circular motions. Gravity helps pull the loosened wax away from the driver.
Do not press hard. The mesh is delicate, and too much pressure can push wax deeper into the speaker or tear the mesh itself. Use light, flicking strokes.
This dry brushing alone removes a surprising amount of loose debris. You will see small flakes of wax fall onto your towel.
Step 3: Remove Stubborn Wax from the Mesh
For wax that will not budge with dry brushing, there are two effective methods:
The hydrogen peroxide method: Dip a cotton swab in 3% hydrogen peroxide, then tap off the excess so it is barely damp. Gently dab the mesh surface and wait about 5 minutes. The peroxide softens hardened wax. Then use your soft brush again to remove the loosened debris.
The tape method: Press a small piece of painter’s tape or Blu Tack gently against the mesh, then lift straight off. The wax sticks to the adhesive and pulls away cleanly. Repeat two or three times until no more wax comes up.
Both methods are safe for the mesh when done gently. The tape method is especially popular among earbud enthusiasts on forums because it requires no liquid at all.
Step 4: Wipe Down the Earbud Body
Lightly dampen a microfiber cloth or cotton swab with 70% isopropyl alcohol. Wipe down the entire exterior of each earbud, paying attention to the stem, the seams, and the area around the mesh opening.
The alcohol disinfects the surface and dissolves skin oils. Use minimal liquid. You want the cloth damp, not dripping. Never apply alcohol directly to the earbud.
Step 5: Clean the Silicone Tips
Fill a small bowl with warm water and a drop of mild dish soap. Submerge the silicone tips and let them soak for 5 to 10 minutes. Use your fingers to rub away any wax or grime from the inside and outside.
Rinse the tips thoroughly under warm running water to remove all soap residue. Shake off excess water and set them on a clean towel to dry.
Step 6: Dry Everything Completely
This is the step most people rush, and it matters. Place all components on a clean, dry towel in a well-ventilated area. Let the silicone tips air dry for at least 2 hours, or ideally overnight.
The earbud bodies should air dry for 15 to 20 minutes after alcohol wiping. Do not use a hair dryer or heat gun, and do not place earbuds in direct sunlight to speed up drying.
Never reassemble or use your earbuds while any part is still damp. Moisture inside the earbud can damage the electronics and void your warranty.
How to Clean the Earbud Mesh Without Damaging It?
The mesh screen is the most fragile part of your earbuds, and it is also where earwax accumulates most aggressively. This section deserves special attention because mesh damage is the most common cleaning-related problem reported on forums.
Understanding the Mesh
The mesh is a fine metal or fabric screen that protects the speaker driver from debris while allowing sound to pass through. It is typically bonded to the earbud housing with adhesive. If the mesh tears, detaches, or gets wax pushed through it, the earbud may need professional repair or replacement.
The Safe Cleaning Method
Always clean the mesh with the earbud facing downward so gravity works in your favor. Use a soft-bristled brush with gentle, outward strokes. Think of it as sweeping debris away from the mesh, not grinding it deeper.
For stubborn wax, the hydrogen peroxide and tape methods described in Step 3 above are your safest options. Both soften or lift wax without applying mechanical force to the mesh.
Tools and Methods to Avoid on the Mesh
Never use any of the following on or near the mesh screen:
Toothpicks, needles, or pins. These puncture or tear the mesh instantly.
Metal tools. Even blunt metal objects can scratch or dent the mesh.
Compressed air. High-pressure air can push wax through the mesh and into the speaker driver, causing permanent damage.
Running water. Do not hold earbuds under a tap. Even water-resistant models are not designed for direct water flow.
Excessive liquid. Any liquid that pools on the mesh can seep into the driver housing.
How to Tell if Your Mesh Is Damaged?
If your earbuds sound distorted, tinny, or unusually quiet even after a thorough cleaning, the mesh may be compromised. Shine a light on the mesh and look for tears, holes, or areas where it appears to be lifting from the housing. If you see damage, contact the manufacturer for repair options.
How to Clean the Charging Case
The charging case is easy to overlook, but it collects debris, pocket lint, and bacteria just like the earbuds themselves. A dirty case can interfere with charging and transfer grime back onto your freshly cleaned earbuds.
Cleaning the Interior
Open the case and use a dry cotton swab to gently wipe out the wells where the earbuds sit. Pay special attention to the charging contacts at the bottom of each well. Wax and debris on these contacts can prevent proper charging.
For stubborn debris, lightly dampen the swab with 70% isopropyl alcohol. Never pour liquid into the case. Use the dampened swab to clean the contacts, then immediately wipe with a dry cloth to remove any residue.
Cleaning the Exterior
Wipe the outside of the case with a disinfectant wipe or a microfiber cloth lightly dampened with alcohol. Clean the hinge area and the seam where the lid meets the base, as these spots collect the most grime.
Moisture Control
Moisture inside the charging case can damage both the case electronics and your earbuds. Keep a small silica gel packet inside the case when storing earbuds for extended periods. This absorbs ambient moisture and keeps the environment dry. Replace the silica packet every few months.
Never store wet or damp earbuds in the charging case. Always ensure they are completely dry before placing them inside.
What Not to Do When Cleaning Your Earbuds?
Many people ruin their earbuds by using the wrong cleaning methods. Forum threads are full of stories about earbuds destroyed by well-meaning cleaning attempts. Here are the critical things to avoid:
Do Not Soak Your Earbuds
Even water-resistant earbuds with an IPX rating are designed for sweat and light rain, not submersion in cleaning solution. Never hold earbuds under running water or drop them into a bowl of liquid. Water can penetrate the speaker driver and cause permanent damage.
Do Not Use Sharp Objects
Toothpicks, needles, safety pins, and paper clips are the most common culprits behind mesh damage. Reddit users repeatedly warn against using these tools. They tear the mesh, scratch the housing, and can push wax deeper into the driver.
Do Not Use Concentrated Alcohol
While 70% isopropyl alcohol is safe for wiping down exterior surfaces, 99% isopropyl alcohol is too harsh. It can degrade adhesives, discolor plastic, and damage rubber components. Stick with 70% concentration and apply it sparingly.
Do Not Use Harsh Chemicals
Avoid bleach, acetone, ammonia-based cleaners, and abrasive household cleaners. These chemicals break down the materials used in earbud construction. Use mild soap and water for silicone tips and isopropyl alcohol for hard surfaces only.
Do Not Reassemble While Wet
Patience saves earbuds. If you reattach silicone tips or place earbuds in the charging case before everything is fully dry, trapped moisture can cause corrosion and electrical shorts. Wait at least 2 hours for silicone tips and 20 minutes for earbud bodies.
Do Not Use a Hair Dryer
Heat from a hair dryer can melt adhesives, warp plastic components, and damage the battery. Air drying is the only safe method. If you are in a hurry, place components in front of a small fan on low speed.
Earbud Maintenance Tips for Long-Term Performance
Cleaning your earbuds once is great, but building a maintenance routine keeps them performing at their best for months or years. Here is what we recommend based on user experiences and manufacturer guidelines.
How Often Should You Clean Your Earbuds?
Do a quick wipe-down of your earbuds with a dry microfiber cloth after every use. This takes about 10 seconds and prevents oils from accumulating. Once a week, do a more thorough wipe with a disinfectant wipe or alcohol-dampened cloth on the exterior surfaces.
Perform a full deep clean, including mesh brushing and silicone tip washing, once a month. If you use your earbuds heavily, exercise with them, or produce a lot of earwax naturally, you may want to deep clean every two weeks.
Store Them Properly
Always store earbuds in their charging case when not in use. This protects them from dust, debris, and accidental damage. Keep the case itself clean and dry.
Avoid leaving earbuds loose in pockets or bags where they collect lint and get scratched. If your case does not have a secure closure, consider a small protective pouch.
Replace Silicone Tips Regularly
Silicone tips wear out over time. They lose their shape, develop tears, and accumulate bacteria in microscopic cracks. Replace your silicone tips every 3 to 6 months, or sooner if you notice visible wear. Many earbuds come with multiple sizes, so keep your spares.
Foam tips degrade even faster and should be replaced every 1 to 3 months depending on usage.
Clean Your Ears Before Inserting Earbuds
This sounds obvious, but the cleanest earbuds will still get dirty if your ears are full of wax. Gently clean your outer ear with a warm washcloth daily. Do not insert cotton swabs deep into your ear canal, as this pushes wax deeper and can cause impaction.
If you produce excessive earwax, consider using over-the-counter earwax softening drops periodically. Consult a doctor if you experience frequent earwax buildup or ear discomfort.
Avoid Sharing Earbuds
Sharing earbuds transfers bacteria and earwax between people. Even with a quick wipe-down, sharing increases the risk of ear infections. If you must share, clean the earbuds thoroughly with alcohol wipes before and after.
FAQs
How do you get ear wax out of earbud mesh?
Use a soft-bristled brush held downward in gentle circular motions to sweep away loose wax. For stubborn buildup, dab the mesh with 3% hydrogen peroxide on a barely damp cotton swab, wait 5 minutes, then brush again. Alternatively, press painter’s tape or Blu Tack against the mesh and lift to pull wax away. Never use toothpicks, needles, or compressed air.
Can I use alcohol wipes on my earbuds?
Yes, you can use 70% isopropyl alcohol wipes on the hard exterior surfaces of your earbuds. Wipe down the stem, body, and seams gently. Do not apply alcohol directly to the mesh screen or use concentrations higher than 70%. Never soak the earbuds or let liquid pool on any surface.
What dissolves ear wax on headphones?
3% hydrogen peroxide is the safest and most effective solution for dissolving hardened earwax on earbud mesh. Apply it sparingly with a cotton swab, let it sit for about 5 minutes, then brush away the softened wax. Warm water with mild dish soap works for cleaning removable silicone tips. Avoid harsh solvents like acetone or bleach.
How often should you clean your earbuds?
Wipe your earbuds with a dry cloth after every use, disinfect exterior surfaces weekly with an alcohol wipe, and perform a full deep clean including mesh brushing and silicone tip washing once a month. Heavy users or those who exercise with earbuds should deep clean every two weeks.
Conclusion
Knowing how to clean earwax and debris out of earbuds is a simple skill that keeps your audio crisp, your ears healthy, and your gear lasting longer. The process comes down to a few core principles: brush gently, use the right solutions sparingly, avoid sharp tools, and let everything dry completely before reassembly.
Build the habit of a quick daily wipe-down and a monthly deep clean, and you will avoid the muffled sound, ear irritation, and premature wear that come from neglect. Your earbuds work hard for you every day. Give them five minutes of care, and they will keep sounding their best for years.