
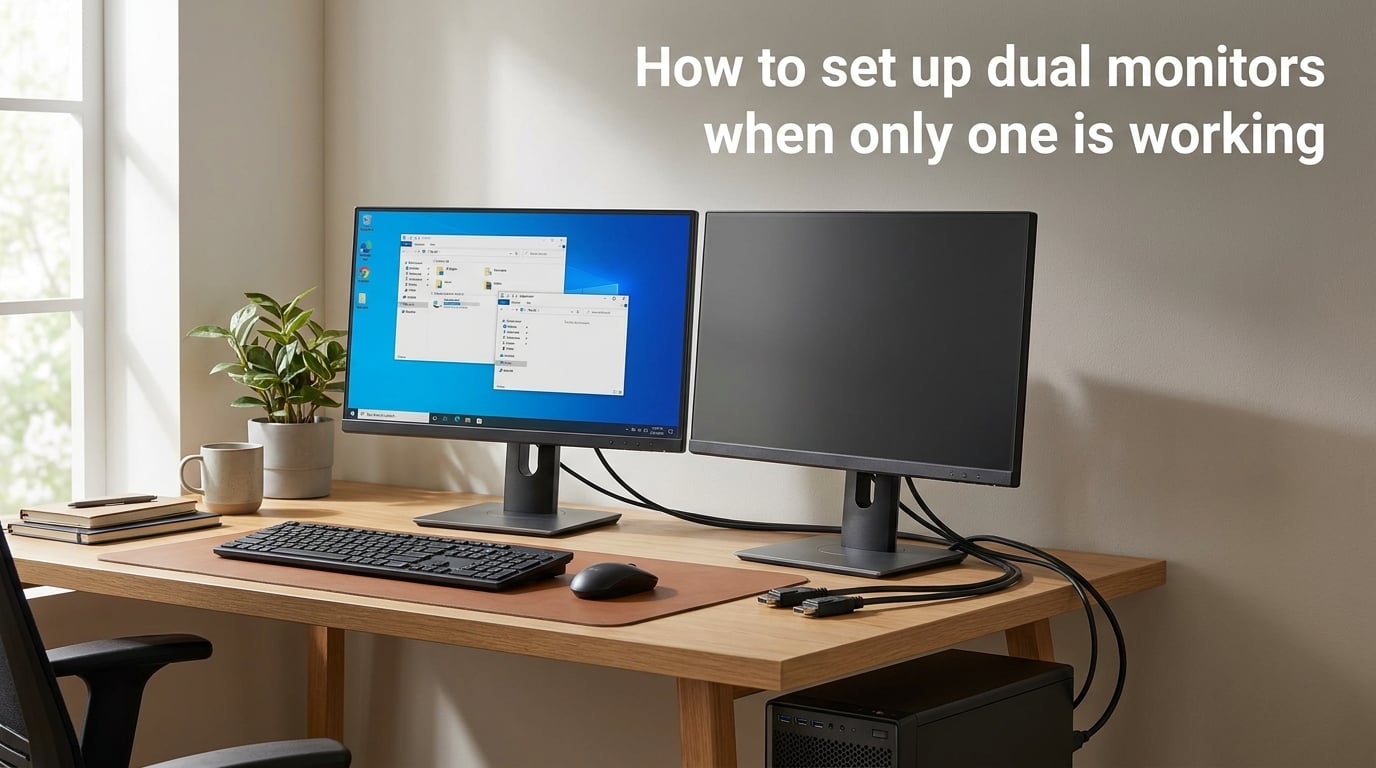
You plugged in your second monitor, hit the power button, and… nothing. The screen stays black while your primary display works perfectly. If you are trying to figure out how to set up dual monitors when only one is working, you are in the right place.
Our team has spent years building multi-monitor workstations, and we have seen every version of this problem. Bad cables, wrong settings, outdated drivers, docking station firmware bugs — the list goes on. The good news is that the vast majority of these issues are fixable in under 15 minutes.
This guide walks you through every layer of troubleshooting, starting with the fastest fixes and moving into deeper system-level problems. Whether you are on Windows 10, Windows 11, or macOS, we cover the exact steps to get that second screen recognized and running in extend mode.
Quick Troubleshooting Checklist: Fix It in 5 Minutes
Before diving into detailed fixes, run through this checklist. These are the most common solutions for when a second monitor is not detected, and they resolve about 70% of cases on their own.
Step 1: Power on the second monitor and confirm its power LED is lit. Many monitors go into deep sleep and need the power button pressed twice.
Step 2: Reseat both ends of the video cable. Unplug the cable from the monitor and the PC, then reconnect firmly. A loose connection is the number one cause of a blank second screen.
Step 3: Press Windows Key + P and select Extend. This shortcut opens the Project menu and forces Windows to apply the extend display mode.
Step 4: Open Settings > System > Display, scroll down, and click Detect (or “Detect other display” in Windows 11). This manually forces Windows to scan for connected monitors.
Step 5: Try a different cable, different port on your graphics card, or a different input on the monitor. If the second monitor wakes up, you have isolated the problem to a cable or port.
Step 6: Restart your computer with both monitors connected and powered on. A full reboot resolves detection issues that a sleep or hibernate cycle can introduce.
If none of these work, move on to the detailed sections below. The problem is likely deeper in your hardware, drivers, or system configuration.
How to Set Up Dual Monitors When Only One Is Working: Hardware Connection Troubleshooting
Hardware issues account for the majority of dual monitor detection failures. Before touching any software settings, you need to rule out physical connection problems. This section covers cables, ports, adapters, and power delivery.
Check Your Cable Connections First
Start with the simplest possible explanation: a bad or loose cable. Even if a cable looks connected, it may not be seated properly. Unscrew or unplug both ends of the cable connecting your second monitor, inspect the connectors for bent pins or debris, and reconnect everything firmly.
We recommend physically swapping cables between your two monitors. If the working monitor stops working with the other cable, you have found your culprit. Damaged HDMI and DisplayPort cables can pass a signal intermittently, which makes them tricky to diagnose without a swap test.
Also check for passive adapters that have gone bad. HDMI-to-DisplayPort or DisplayPort-to-DVI adapters fail more often than the cables themselves. If you are using an adapter, try bypassing it with a direct cable connection to see if the monitor is detected.
Use the Right Ports on Your Graphics Card
This is where many users go wrong. If you have a desktop with a dedicated graphics card, your motherboard also has video ports on the back panel. You cannot mix and match.
Both monitors must connect to ports on the same graphics processor. If one monitor is plugged into the dedicated GPU and the other into the motherboard’s HDMI port, only one will work. The motherboard video outputs are typically disabled when a dedicated GPU is installed.
Check the back of your PC. The motherboard video ports are usually located higher up, near the USB ports and Ethernet jack. The GPU ports are lower down, on a separate metal bracket. Move any cables plugged into motherboard ports to the GPU.
Understanding Cable Types: HDMI vs DisplayPort vs USB-C
Different cable types have different capabilities, and using the wrong cable can prevent dual monitor setups from working. Here is what you need to know about the three most common options.
HDMI: The most widely available cable type. HDMI 2.0 supports 4K at 60Hz, and HDMI 2.1 handles 4K at 120Hz. For dual monitor setups, HDMI works well for most users. The main limitation is that some older HDMI 1.4 cables max out at 1080p at 60Hz, which can cause resolution issues on newer monitors.
DisplayPort: The preferred cable for gaming and high-refresh-rate monitors. DisplayPort 1.4 supports 4K at 120Hz with HDR. DisplayPort also supports daisy chaining (Multi-Stream Transport), which lets you connect two monitors to a single DisplayPort output on your GPU. If you are running two high-resolution monitors, DisplayPort is the better choice.
USB-C (with DisplayPort Alt Mode): Common on laptops and modern monitors. A single USB-C cable can carry video, data, and power. This is the standard for docking stations. However, not all USB-C ports support video output — only those labeled with a DisplayPort (D-shaped) icon or Thunderbolt icon support Alt Mode.
If one monitor works and the other does not, check whether the non-working monitor is on a different cable type. Mixing cable types (for example, one DisplayPort and one HDMI) usually works fine, but some GPUs have quirks with certain combinations.
Power Cycle Everything
Turn off both monitors, unplug them from the wall, and hold their power buttons for 15 seconds to drain residual charge. Then unplug your PC power cable for 30 seconds. Reconnect everything and boot up.
This full power cycle clears cached display information that can accumulate in monitor firmware and GPU memory. It sounds simple, but it fixes stubborn detection issues that survive a normal reboot.
Windows Display Settings: Force Detect and Configure Your Second Monitor
If your hardware is solid, the problem is likely in Windows display settings. Windows 10 and Windows 11 have a built-in detection tool that can force the operating system to recognize a connected monitor. Here is the step-by-step walkthrough.
Use Windows Key + P to Change Display Mode
The fastest way to change how Windows handles multiple monitors is the keyboard shortcut Windows Key + P. This opens the Project panel with four options:
PC screen only: Turns off the second monitor and uses only the primary display. If your system is stuck in this mode, the second monitor will appear dead even though it is connected and powered on.
Duplicate: Shows the same image on both monitors. Useful for presentations, but limits your second screen to the resolution of the lower-resolution display.
Extend: Expands your desktop across both monitors. This is the mode you want for a true dual monitor workspace. Each screen gets its own resolution and can run different applications independently.
Second screen only: Turns off the primary display and uses only the second monitor. Useful for laptop users who close their lid while connected to an external monitor.
Press Windows Key + P and select Extend. Wait a few seconds. If your second monitor is connected properly, it should wake up.
Force Windows to Detect the Second Monitor
If Windows Key + P does not work, you can manually force detection through Settings.
On Windows 11: Right-click the desktop and select Display settings. Scroll down to the Multiple displays section. Click the Detect button (it may say “Detect other display”). Windows will scan all video outputs for connected monitors.
On Windows 10: Right-click the desktop, select Display settings. Scroll to Multiple displays and click Detect. The process is identical to Windows 11.
If Windows finds the monitor, it will appear as a numbered rectangle in the display arrangement area. You can then drag the rectangles to match your physical monitor layout. Click Apply to save.
If Detect does nothing, the issue is likely a driver problem or a hardware fault. Continue to the driver section below.
Set Your Primary and Secondary Displays
Once both monitors are detected, you need to tell Windows which one is primary. The primary display shows the taskbar, desktop icons, and newly opened applications.
In Settings > System > Display, click on the rectangle representing the monitor you want as primary. Scroll down to the Multiple displays section and check the box that says Make this my main display. The change applies immediately.
You can also rearrange the numbered rectangles to match how your monitors sit on your desk. If your second monitor is to the right of your primary, drag rectangle 2 to the right of rectangle 1. This ensures your mouse cursor moves naturally between screens.
Check for Disabled Displays in Graphics Control Panel
Sometimes Windows Settings does not show a connected monitor, but your GPU control panel does. Open your graphics control panel:
NVIDIA Control Panel: Right-click the desktop and select NVIDIA Control Panel. Go to Set up multiple displays in the left sidebar. Check if your second monitor appears in the list. If it does, check the box next to it to enable it.
AMD Adrenalin: Right-click the desktop, select AMD Software. Go to Gaming > Display. Look for the display layout and check if your second monitor is disabled.
Intel Graphics Command Center: Right-click the desktop and open Intel Graphics Command Center. Go to Display and check if both monitors appear. You can force enable a disabled display here.
If your monitor shows up in the GPU control panel but not in Windows Settings, updating your graphics driver usually fixes the disconnect.
Graphics Driver Updates and Reinstallation
Outdated, corrupted, or conflicting graphics drivers are the second most common cause of dual monitor failures (after cable issues). Windows Update does not always install the latest GPU drivers, so you may need to handle this manually.
Update Your Graphics Driver
Download the latest driver directly from your GPU manufacturer’s website. Avoid using the generic drivers that Windows Update provides — they often lack full multi-monitor support.
For NVIDIA GPUs: Download the driver from the NVIDIA website or use GeForce Experience. The driver installer includes an option for a clean installation, which removes old driver files before installing the new ones.
For AMD GPUs: Download from the AMD website or use AMD Adrenalin. AMD offers a factory reset option during installation that clears previous driver settings.
For Intel integrated graphics: Download the Intel Driver and Support Assistant, which scans your system and installs the correct graphics driver automatically.
After installing the new driver, restart your computer. With both monitors connected and powered on, check if the second display is now detected in Settings.
Clean Install: Remove Old Drivers Completely
If a standard update does not fix the issue, try a clean driver installation. Old driver remnants can conflict with new installations and cause detection failures.
Download a free utility called DDU (Display Driver Uninstaller). Boot Windows into Safe Mode, run DDU, and select “Clean and restart.” This completely removes all traces of your current graphics driver.
After the restart, install the fresh driver you downloaded from the manufacturer’s website. This process resolves stubborn driver conflicts that survive normal updates.
Roll Back a Driver That Broke Your Setup
Sometimes a driver update causes the problem rather than fixing it. If your dual monitor setup was working fine and then stopped after a driver update, roll back to the previous version.
Open Device Manager (right-click Start, select Device Manager). Expand Display adapters, right-click your GPU, and select Properties. Go to the Driver tab and click Roll Back Driver. If this option is grayed out, uninstall the current driver and install an older version from the manufacturer’s website.
This is especially relevant for AMD and Intel GPU users. AMD’s Adrenalin updates have occasionally introduced multi-monitor bugs, and Intel’s integrated graphics drivers have had detection issues with certain monitor combinations.
Docking Station Dual Monitor Issues
Docking stations introduce a layer of complexity between your computer and your monitors. They are extremely common in office environments, and they are responsible for a disproportionate number of dual monitor headaches. If only one monitor works through your docking station, this section is for you.
Common Docking Station Problems
Docking stations from Dell, HP, Lenovo, and third-party brands like CalDigit and Anker all have their own firmware. When that firmware has bugs or is outdated, one monitor may fail to be detected while the other works fine.
The most common dock-related issue is bandwidth limitation. A USB-C dock using a single cable to the computer may not have enough bandwidth to drive two 4K monitors at 60Hz simultaneously. If one monitor is 4K and the other is 1080p, the dock may prioritize the 4K display and drop the lower-resolution screen.
Another frequent issue is power delivery. Some docks cannot deliver enough power to the host laptop while also driving two external monitors. The laptop throttles the dock’s display output, causing one monitor to go dark.
Update Your Dock Firmware
Docking station firmware updates are often overlooked. Each manufacturer provides firmware update utilities:
Dell: Use the Dell Command Update utility or download firmware updates from the Dell support page for your specific dock model (D6000, WD19, WD22, etc.). Dell docks frequently receive firmware patches that fix dual monitor detection bugs.
HP: Use the HP Support Assistant app to check for dock firmware updates. HP Thunderbolt docks have had several firmware revisions specifically addressing multi-monitor detection.
Lenovo: Download the Lenovo Vantage app or check the ThinkPad docks support page. Lenovo’s ThinkPad Universal docks have had known issues with second monitor detection that firmware updates resolve.
DisplayLink docks: If your dock uses DisplayLink technology (common in USB-A docks), download the latest DisplayLink driver from the DisplayLink website. DisplayLink driver updates frequently fix detection issues.
Dock Connection Best Practices
Connect the dock to your computer using the shortest, highest-quality cable possible. Long USB-C cables can introduce signal degradation that causes intermittent monitor detection failures.
Plug both monitors directly into the dock using native cables rather than adapters. HDMI-to-DisplayPort adapters on dock outputs are a common source of detection problems.
Finally, connect the dock’s power adapter to a wall outlet rather than a power strip. Insufficient power to the dock can cause one monitor output to fail while the other works.
macOS Dual Monitor Troubleshooting
None of the top-ranking competitors cover macOS, which is a significant gap. Mac users run into dual monitor problems too, and the troubleshooting steps differ from Windows. Here is what to do if your Mac only recognizes one external monitor.
Check Your Mac’s Video Output Capabilities
Not all Macs support the same number of external displays. Apple Silicon Macs have specific limits:
The MacBook Air (M1) officially supports only one external display. The MacBook Air (M2 and later) supports two. The MacBook Pro 14-inch and 16-inch (M1 Pro/Max and later) support two to four external displays depending on the chip.
If you have an M1 MacBook Air and are trying to connect two external monitors, only one will work without third-party workarounds like DisplayLink adapters.
Intel-based Macs generally support two external displays, but the exact number depends on the model. Check Apple’s tech specs page for your specific Mac model to confirm the external display limit.
Force Detect in macOS Displays Settings
On macOS Ventura and later, open System Settings > Displays. If your second monitor is not showing, hold the Option key on your keyboard. The “Detect Displays” button will appear. Click it to force macOS to scan for connected monitors.
On older macOS versions (Monterey and earlier), open System Preferences > Displays and hold the Option key to reveal the Detect Displays button.
Reset NVRAM and SMC (Intel Macs Only)
On Intel-based Macs, corrupted NVRAM (non-volatile RAM) can cause display detection failures. To reset NVRAM, shut down the Mac, turn it on, and immediately press and hold Option + Command + P + R for about 20 seconds.
For SMC (System Management Controller) reset, the process varies by Mac model. On MacBook models with non-removable batteries, shut down the Mac, then press Shift + Control + Option on the left side of the keyboard and the power button simultaneously for 10 seconds. Release all keys, then turn on the Mac.
Apple Silicon Macs do not have separate NVRAM or SMC reset procedures — a simple shutdown and restart accomplishes the same thing.
Use the Right USB-C or Thunderbolt Cables
Mac monitors connect through Thunderbolt/USB-C ports. Not all USB-C cables are equal. A charging-only USB-C cable will not carry video. Look for cables certified for Thunderbolt 3, Thunderbolt 4, or USB-C with DisplayPort Alt Mode.
The cable that came with your Mac’s power adapter is often charging-only. Use the cable that came with your monitor or a certified Thunderbolt cable for video connections.
Advanced Issues: BIOS vs Windows Detection, Refresh Rate Conflicts
Some dual monitor problems do not fit neatly into the cable or driver categories. These advanced issues are well-documented in forum discussions but rarely covered by mainstream guides.
BIOS Shows Both Monitors But Windows Only Sees One
This is a specific and frustrating scenario. When you boot your computer, the BIOS screen, boot logo, or manufacturer splash appears on both monitors. But once Windows loads, the second monitor goes dark and is not detected.
This happens because the BIOS uses the GPU’s firmware-level display output, which is separate from the Windows driver. The BIOS can drive both monitors through basic display protocols, but the Windows driver may have a conflict preventing it from initializing the second output.
The fix is almost always driver-related. Perform a clean driver installation using DDU as described in the driver section above. If that does not work, update your motherboard BIOS, as some BIOS versions have compatibility issues with certain GPU and monitor combinations.
Also check if your GPU has a firmware update separate from the driver. NVIDIA and AMD occasionally release GPU firmware updates (sometimes called VBIOS updates) that fix display output issues.
One Monitor Works at a Time (Toggle Behavior)
Some users report that both monitors are detected, but only one works at a time. If you turn off monitor A, monitor B activates. If you turn on monitor A, monitor B goes dark. They never work simultaneously.
This is almost always a bandwidth or power limitation. Your GPU or dock cannot drive both monitors at their current settings simultaneously. The fix is to reduce the load:
Lower the resolution on one or both monitors. If both are running at 4K, try dropping one to 1440p. Reduce the refresh rate from 144Hz to 60Hz. Disable HDR on one or both monitors, as HDR requires additional bandwidth.
If you are using a dock, connect one monitor directly to the computer and the other through the dock. This distributes the video output load across two different sources.
Monitors Work in Duplicate Mode But Not Extend Mode
This specific issue is a common complaint on forums. Both monitors display the same image in duplicate mode, but when you switch to extend mode, the second monitor goes black.
The root cause is usually a resolution or refresh rate mismatch. In duplicate mode, Windows uses the lower resolution and refresh rate of the two monitors, so both can display the same signal. In extend mode, each monitor runs independently at its native settings, which can trigger a conflict.
Open Settings > System > Display, select each monitor, and check its resolution and refresh rate. Try setting both monitors to the same resolution and a conservative 60Hz refresh rate. If extend mode starts working, you can gradually increase settings to find the threshold where the conflict occurs.
Windows Update Broke Your Dual Monitor Setup
This is painfully common. Your dual monitors worked perfectly yesterday, Windows updated overnight, and now only one screen is detected. Windows updates can overwrite GPU drivers with generic versions or introduce display management bugs.
Open Settings > Windows Update > Update history and look for recent driver updates. If a GPU driver was recently updated through Windows Update, it may have replaced your manufacturer driver.
Uninstall the Windows-provided driver through Device Manager and reinstall the manufacturer driver. To prevent this from happening again, download the wushowhide diagnostic tool from Microsoft and use it to hide specific GPU driver updates.
Resolution, Scaling, and Refresh Rate Fixes
Even after both monitors are detected and working, you may encounter display quality issues. Blurry text, misaligned cursors, and flickering screens are all symptoms of resolution and scaling mismatches in a dual monitor setup.
Set the Correct Resolution for Each Monitor
In Settings > System > Display, click each monitor rectangle and verify the resolution matches the monitor’s native specification. Windows sometimes defaults to a lower resolution for newly detected monitors, which causes blurry text and stretched images.
If the correct resolution is not available in the dropdown, your graphics driver is likely not communicating properly with that monitor. This is often an EDID (Extended Display Identification Data) handshake failure — the monitor is not telling the GPU its capabilities. Updating the graphics driver or using a different cable usually resolves EDID issues.
Adjust Display Scaling for Mixed-Resolution Setups
If you have two monitors with different pixel densities (for example, a 4K 27-inch and a 1080p 24-inch), text and icons will appear different sizes by default. Windows scaling fixes this.
Select each monitor in Display Settings and adjust the Scale percentage. A 4K monitor typically needs 150% scaling to match the text size of a 1080p monitor at 100%. Experiment with the scale values until text appears similar in size on both screens.
Note that some older applications do not handle per-monitor scaling correctly. If a specific app looks blurry on one screen, that is a limitation of the app, not your display settings.
Fix Refresh Rate Conflicts Between Monitors
Running two monitors at different refresh rates can cause stuttering or flickering, especially when playing video or moving windows between screens. For example, a 144Hz primary monitor and a 60Hz secondary monitor can produce judder when dragging windows.
Open Settings > System > Display > Advanced display and check the refresh rate for each monitor. If you are experiencing issues, try setting both monitors to the same refresh rate (typically 60Hz). This eliminates the cross-screen stutter caused by mismatched refresh timing.
If you need different refresh rates (for example, 144Hz for gaming on one monitor), enable hardware-accelerated GPU scheduling in Windows Graphics settings. This feature, available on Windows 10 version 2004 and later, lets the GPU manage display timing independently and reduces multi-monitor stutter.
Preventing Future Dual Monitor Issues
Once you have your dual monitor setup working, a few habits can prevent it from breaking again.
Use high-quality cables from reputable brands. Cheap, unbranded HDMI and DisplayPort cables are the leading cause of intermittent monitor detection problems. They may work initially but degrade quickly, causing flickering, signal drops, and complete detection failures.
Avoid Windows Update GPU driver installations. When Windows offers a GPU driver through Windows Update, hide it using the wushowhide tool and always install drivers directly from NVIDIA, AMD, or Intel. Manufacturer drivers are more stable and better tested for multi-monitor configurations.
Keep your dock firmware updated. Set a reminder to check for firmware updates every three months if you use a docking station. Dock manufacturers release fixes for detection bugs regularly, and staying current prevents recurring issues.
If you frequently disconnect and reconnect monitors (common with laptop setups), use the same ports every time. Windows remembers display configurations per port, and switching ports can confuse the display cache. Plugging into the same ports consistently ensures Windows applies your saved layout automatically.
Frequently Asked Questions
Why is only one screen working on dual monitors?
The most common reasons are a loose or damaged cable, the monitor being powered off or in sleep mode, Windows being set to PC screen only mode, an outdated graphics driver, or both monitors being plugged into different graphics processors (one on the GPU, one on the motherboard). Start by reseating both cable connections, pressing Windows Key + P to select Extend mode, and using the Detect button in Settings u0026gt; System u0026gt; Display.
How do I set up dual monitors to work separately?
Right-click your desktop and select Display settings. Under Multiple displays, choose Extend these displays. Click each numbered monitor rectangle and arrange them to match your physical desk layout. Set the correct resolution and scale for each monitor individually. Click Apply, then select the monitor you want as primary and check Make this my main display.
How to run 2 monitors with only 1 HDMI port?
You have three options. First, check if your GPU has other ports like DisplayPort or USB-C and use those for the second monitor. Second, use a docking station or USB display adapter that adds additional video outputs. Third, use DisplayPort daisy chaining if both monitors support Multi-Stream Transport (MST), which connects two monitors to a single DisplayPort output. Avoid HDMI splitters, as most only duplicate the signal rather than extending the display.
How to use only one screen on dual monitors?
Press Windows Key + P and select PC screen only to turn off the second monitor. Alternatively, go to Settings u0026gt; System u0026gt; Display, click the monitor you want to disable, and under Multiple displays select Disconnect this display. You can also simply turn off the second monitor with its power button, though Windows may still send a signal to it.
Why does my second monitor only work in duplicate mode but not extend?
This is typically caused by a resolution or refresh rate mismatch between the two monitors. In duplicate mode, Windows uses the lower settings of both monitors, which works. In extend mode, each monitor runs independently, and the conflict causes the second screen to go dark. Try setting both monitors to the same resolution and 60Hz refresh rate, then switch to extend mode. If it works, gradually increase settings to find the threshold.
Why does BIOS show both monitors but Windows only sees one?
The BIOS uses firmware-level display output that is separate from the Windows driver. When the BIOS detects both monitors but Windows does not, it usually means the Windows graphics driver has a conflict or corruption. Perform a clean driver installation using Display Driver Uninstaller (DDU) in Safe Mode, then install a fresh driver from your GPU manufacturer. Updating your motherboard BIOS can also resolve compatibility issues.
Why does only one monitor work at a time with my docking station?
This is usually a bandwidth or power limitation. Your dock may not have enough bandwidth to drive both monitors at their current resolution and refresh rate. Try lowering the resolution or refresh rate on one monitor, disable HDR, or connect one monitor directly to the computer instead of through the dock. Also update the dock firmware, as manufacturers frequently release patches for detection bugs.
Can a Windows Update break my dual monitor setup?
Yes. Windows Update can replace your manufacturer GPU driver with a generic version, causing the second monitor to stop being detected. Check Update history for recent driver updates. If a GPU driver was auto-installed, uninstall it through Device Manager and reinstall the driver directly from NVIDIA, AMD, or Intel. Use the wushowhide tool to prevent Windows from auto-installing GPU drivers in the future.
Conclusion
Getting a second monitor working when only one displays is one of the most common — and most fixable — PC problems. The vast majority of cases come down to a bad cable, an incorrect Windows display mode, or an outdated graphics driver. Start with the quick checklist, and work your way through the detailed sections if the fast fixes do not resolve it.
Knowing how to set up dual monitors when only one is working saves you time and frustration every time you reconfigure your workspace. Bookmark this guide so you can return to it the next time a monitor goes dark after an update or a cable change. The solution is almost always in this list.