
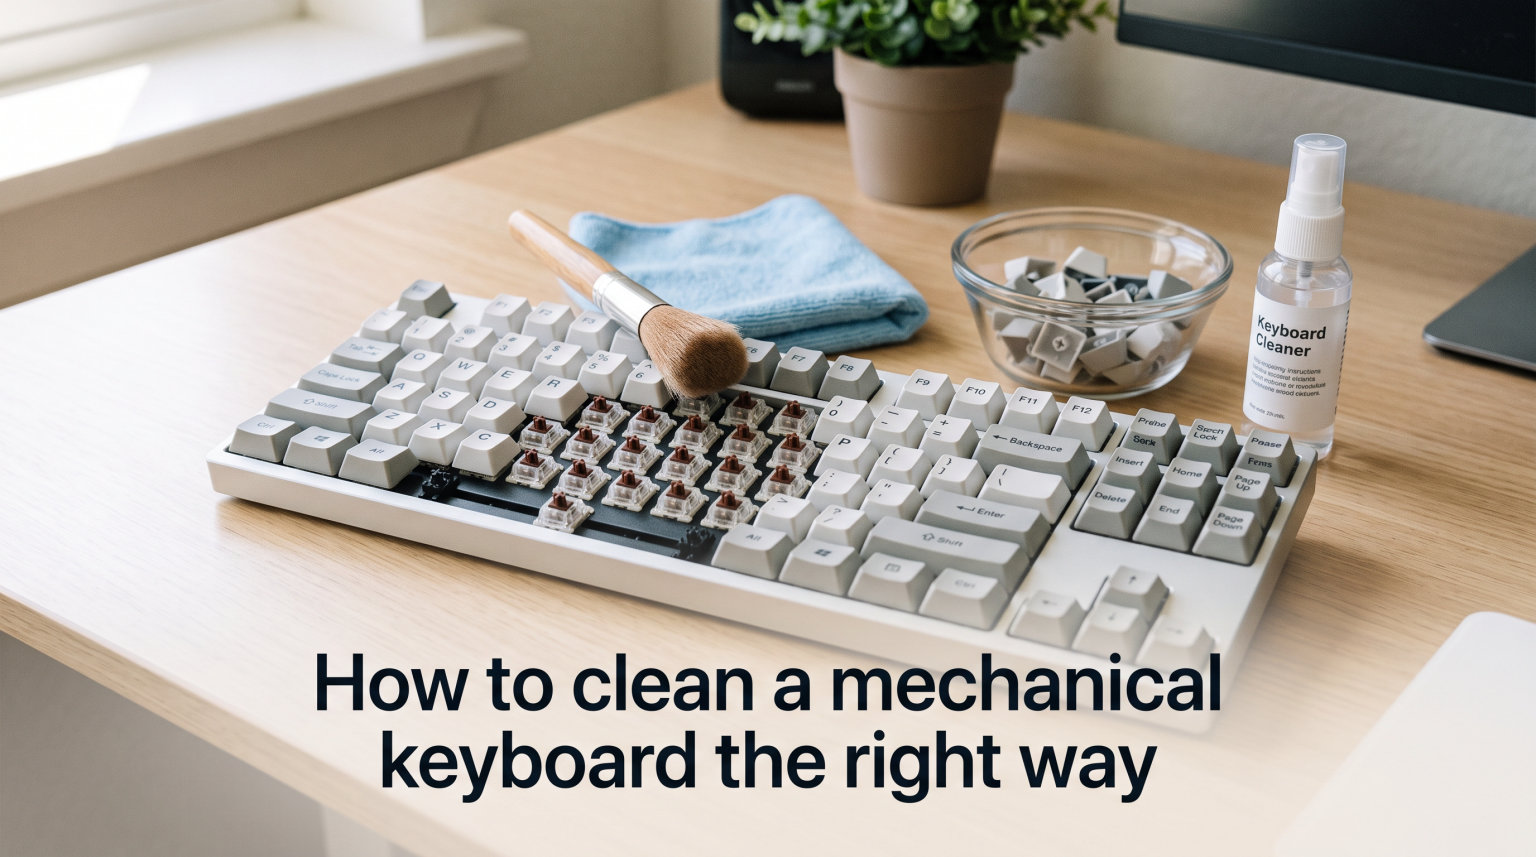
If you are typing on a mechanical keyboard right now, there is a good chance it has months of dust, crumbs, and oils built up under the keycaps. Learning how to clean a mechanical keyboard the right way can add years to its lifespan and keep every keystroke feeling crisp. I have cleaned dozens of mechanical keyboards over the years, from budget boards to custom builds, and the process is simpler than most people think.
A dirty keyboard does not just look bad. Dust and grime work their way into switches, causing sticky or unresponsive keys. Oils from your fingers degrade keycap surfaces over time. And if you eat near your desk, food particles attract bacteria that multiply between the keys. Regular cleaning fixes all of this.
In this guide, I will walk you through the full deep-clean process step by step. You will learn how to remove keycaps safely, clean different switch types, deal with spills, and keep your keyboard in top shape between cleanings. I will also cover quick-clean methods for when you do not have time for a full teardown.
Tools and Materials You Need
Before you start, gather your supplies. Having everything ready makes the process smooth and prevents mid-clean scrambling. Here is what I recommend for a proper mechanical keyboard cleaning.
Essential Tools
Keycap puller: This is the single most important tool. A wire keycap puller is best because it distributes pressure evenly and will not scratch your keycaps. If your keyboard came with a puller in the box, that works too.
Compressed air or air blower: A can of compressed air dislodges dust and debris from around the switches. A reusable rubber air blower like a Giottos Rocket Blaster works well and never runs out.
Isopropyl alcohol (70% or higher): Use this for cleaning the keyboard body, switches, and PCB area. I prefer 70% for most cleaning because it evaporates at a manageable rate and has enough water content to dissolve grime. Higher concentrations like 90% or 99% evaporate faster but can leave some residue behind if you do not wipe quickly.
Microfiber cloth: Use this to wipe down the keyboard case and exterior surfaces. A damp microfiber cloth handles most surface grime without scratching.
Soft-bristled brush: A clean makeup brush or a dedicated keyboard brush sweeps dust from hard-to-reach areas. Soft bristles are key here. Stiff brushes can scratch plastic surfaces.
Cotton swabs (Q-tips): These are your precision tools. Dip them in isopropyl alcohol to clean around switch housings, stabilizer wires, and tight corners.
Warm soapy water: A bowl of warm water with a few drops of mild dish soap is all you need for soaking keycaps.
Optional but Helpful
Denture cleaning tablets: Drop a couple of these into warm water for a deeper keycap soak. The effervescent action lifts grime from textured keycap surfaces better than soap alone.
Keycap puller alternative: If you do not have a puller, a bent paperclip or a flathead screwdriver wrapped in tape can work. Use these carefully to avoid damaging keycaps or switches.
A camera or phone: Take a photo of your keyboard before removing any keycaps. This saves you from guessing where everything goes during reassembly.
How to Clean a Mechanical Keyboard: Step-by-Step
Learning how to clean a mechanical keyboard comes down to six clear steps. The full deep clean takes about 30 to 60 minutes of active work, plus drying time. Here is the process I use every time.
First, unplug and prepare your keyboard. Second, remove all keycaps safely. Third, clean the keycaps with soap, water, or denture tablets. Fourth, clean the keyboard body and switches. Fifth, let everything dry completely. Sixth, reassemble and test.
Follow these steps in order and you will not go wrong. Let me break each one down in detail.
Step 1: Unplug and Prepare Your Keyboard
Start by disconnecting your keyboard. If it is a wired model, unplug the USB cable from your computer. For wireless keyboards, turn the power switch off and remove the batteries. This prevents any electrical issues while you work.
Before removing anything, take a clear photo of your keyboard from directly above. Make sure every key is visible. You will thank yourself later when you are staring at a pile of keycaps trying to remember the exact layout. This is especially important if you have a non-standard layout like a 75%, 96%, or ortholinear keyboard.
Next, get rid of the loose debris. Turn the keyboard upside down over a trash can and give it a few gentle shakes. You would be surprised how much dust and crumb debris falls out. Some people on the r/MechanicalKeyboards subreddit swear by this shake method as a starting point, and it genuinely works for loose particles.
After shaking, use compressed air to blow out remaining loose dust from the keyboard surface. Hold the can upright and use short bursts. Long bursts can cause the can to freeze and release liquid propellant, which you do not want near your keyboard.
Step 2: Remove Keycaps Safely
Keycap removal is the step that intimidates people most, but it is straightforward with the right technique. Position your keycap puller around the first keycap, making sure the wires sit under the keycap edges. Pull straight up with steady, even pressure. The keycap should pop off cleanly.
Start with corner keys and work your way inward. This gives you a systematic approach and makes it easier to track progress. Letter keys and number keys are the simplest to remove because they use standard single-switch mounts.
For larger keys like the spacebar, Shift, Enter, and Backspace, be extra careful. These keys use stabilizers, which are metal wires that keep the key from wobbling. Pull these straight up with gentle, even pressure. If a stabilized key feels stuck, wiggle it slightly side to side while pulling up. Never force a keycap off, as this can break the stabilizer stem or the switch beneath it.
If you do not have a keycap puller, you can use a bent paperclip shaped into a U. Slide it under opposite corners of the keycap and pull up gently. A flathead screwdriver wrapped in a layer of tape also works, but apply pressure very carefully to avoid scratching the keycap or switch.
One thing to note: PBT keycaps are generally thicker and more durable than ABS keycaps. Both materials are safe to remove and clean, but ABS keycaps are softer and can scratch more easily if you use metal tools. If you have expensive artisan keycaps or doubleshot PBT sets, take extra care during removal.
Place all removed keycaps in a bowl or container as you go. Keep them together so nothing gets lost.
Step 3: Clean the Keycaps
Now that your keycaps are off, it is time to clean them. There are two effective methods I recommend, and both produce great results.
Method 1: Warm Soapy Water
Fill a bowl with warm water and add a few drops of mild dish soap. Submerge all the keycaps and let them soak for 30 to 60 minutes. The warm water loosens oils, dust, and grime from the keycap surfaces and stems.
After soaking, use a soft-bristled brush or an old toothbrush to scrub each keycap. Pay attention to the underside stem area where grime accumulates. Rinse each keycap under clean running water and set it aside.
Method 2: Denture Tablet Soak
This is a favorite trick in the mechanical keyboard community. Drop two denture cleaning tablets into a bowl of warm water and add your keycaps. The effervescent action gets into textured surfaces and lifts stains that soap alone might miss. Soak for 30 minutes, then scrub lightly and rinse.
I have used both methods and honestly, denture tablets produce noticeably cleaner keycaps, especially on lighter colored sets that have yellowed from finger oils. The foaming action reaches into the small texture grooves on top of the keycaps.
Can you put keycaps in the dishwasher?
Some people on forums claim they run keycaps through the dishwasher successfully. I do not recommend this. The high heat can warp thin ABS keycaps, and the detergent is harsher than needed. Stick with hand washing to preserve your keycaps. The risk of ruining a nice keycap set is not worth the convenience.
Can you wash mechanical keyboard keycaps in the sink?
Yes, washing keycaps in the sink is fine. Just use warm water, not hot. Extremely hot water can warp certain plastics. Use a colander or strainer if you are worried about keycaps slipping down the drain.
Step 4: Clean the Keyboard Body and Switches
With the keycaps soaking and the keyboard exposed, you can now clean the keyboard body. This is where compressed air, isopropyl alcohol, and cotton swabs do the heavy lifting.
Start with compressed air. Hold the keyboard at an angle and blow air between and around the switches. Use short bursts and keep the nozzle a few inches away. This dislodges dust that settled on the PCB and around switch housings. Work in rows from top to bottom so you push debris out systematically.
Next, use a soft brush to sweep away any remaining dust. A clean makeup brush works perfectly here. Gently sweep around each switch, paying attention to the corners and edges of the keyboard case. The brush loosens dust that compressed air might leave behind.
For sticky grime and oils on the keyboard plate and case, use a microfiber cloth lightly dampened with isopropyl alcohol. Wipe the flat surfaces between switches. The alcohol cuts through finger oils and evaporates quickly. Never spray alcohol or any liquid directly onto the keyboard. Always apply it to your cloth or cotton swab first.
Use cotton swabs dipped in isopropyl alcohol for precision cleaning around switch housings and stabilizer wires. Gently wipe around each switch base. This removes the dark grime ring that forms around frequently used keys like WASD and the spacebar.
Switch-specific care tips:
Different switch types need slightly different approaches. For Cherry MX-style switches (the most common type), avoid getting liquid inside the switch housing. The internal metal leaf contacts can corrode. Clean around the outside only.
For optical switches, the same rule applies. Optical switches use light-based actuation instead of metal contacts, but the housing still has sensitive components. Keep liquid away from the switch opening.
For hot-swappable keyboards, you have the option of removing individual switches for a deeper clean. Use a switch puller to pull switches out, clean the PCB beneath, and reinsert. If your switches feel scratchy or gritty after cleaning, a small amount of switch lubricant can restore smooth travel. But lubing switches is an advanced topic, so stick with external cleaning unless you are comfortable disassembling switches.
Stabilizer cleaning:
Stabilizers collect a surprising amount of grime. Use a cotton swab with isopropyl alcohol to clean around the stabilizer wire and housing. If your stabilizers rattle after cleaning, a tiny dab of dielectric grease on the stabilizer wire ends can quiet them down. Apply sparingly, as too much grease attracts dust.
Critical warning: Never soak or submerge the keyboard PCB or case in water. Water and electronics do not mix. Even if your keyboard is water-resistant, full submersion can seep into switch housings and cause corrosion over time. Use damp cloths and cotton swabs only.
Step 5: Dry Everything Thoroughly
Drying is the step people rush, and it causes the most problems. Wet keycaps reassembled onto switches can trap moisture, leading to switch corrosion or PCB damage.
Start by laying all keycaps stem-side down on a clean microfiber cloth or towel. Gently pat them dry to remove surface water. Then let them air dry for at least 4 to 6 hours. Overnight is even better.
If you are in a hurry, you can use a fan to speed up drying. Position a fan to blow across the keycaps. Never use a hair dryer on hot setting, as the heat can warp plastic keycaps. A hair dryer on the cool setting is fine.
For the keyboard body, let any isopropyl alcohol evaporate completely before reassembly. Alcohol at 70% concentration takes about 10 to 15 minutes to fully evaporate. Wait at least 20 minutes to be safe.
How do you know keycaps are dry? Feel inside the stem. If it feels cool or damp to the touch, wait longer. The inside of the stem retains moisture longer than the outer surface.
Step 6: Reassemble Your Keyboard
Once everything is completely dry, reassembly is straightforward. Pull up that reference photo you took before starting.
Start with the corner keys again. Press each keycap firmly onto its switch until you feel it seat with a satisfying click. For stabilized keys, align the keycap carefully over the stabilizer inserts and switch stem, then press down evenly. These keys may require slightly more pressure to seat properly.
Work systematically from one side to the other. If a keycap does not sit flush, remove it and check for obstructions. Sometimes a small piece of debris or a misaligned stem prevents proper seating.
Once all keycaps are back on, plug in your keyboard and test every single key. Open a text document and type through the alphabet, numbers, function keys, and modifiers. If any key does not register, remove the keycap and check that the switch is functioning. Most of the time, the switch just needs the keycap reseated properly.
How to Clean Mechanical Keyboard Without Removing Keys
Sometimes you need a quick clean and do not have time for a full teardown. You can get your keyboard looking and feeling much better with a surface clean that takes about 5 minutes.
Start by turning the keyboard upside down and gently shaking over a trash can. This dislodges loose crumbs and dust. Follow up with compressed air, blowing between the keycaps in short bursts. Hold the keyboard at an angle so debris flies out rather than deeper into the board.
Next, use a soft brush to sweep dust from the keycap surfaces and gaps between keys. A clean makeup brush works great for this. Sweep from multiple directions to catch dust trapped between keycaps.
For visible grime on keycap tops, wipe them with a microfiber cloth slightly dampened with isopropyl alcohol. Do this with the keyboard unplugged and be careful not to let liquid drip between the keys.
This surface clean method is perfect for weekly maintenance. But every 2 to 3 months, you should do the full deep clean described above to keep your keyboard in peak condition.
Emergency Spill Recovery: What to Do When You Spill on Your Keyboard
Spills are the number one enemy of mechanical keyboards. Whether it is coffee, soda, or water, how you respond in the first 60 seconds determines whether your keyboard survives. I have seen keyboards saved and ruined by the actions taken immediately after a spill.
Immediate steps (first 60 seconds):
Unplug the keyboard instantly. If it is wireless, remove the batteries right away. Every second of power flowing through a wet PCB increases the chance of a short circuit.
Flip the keyboard upside down immediately. This prevents liquid from pooling on the PCB and seeping deeper into switch housings. Keep it upside down and let gravity work.
Remove all keycaps as quickly as you can. This exposes the switches and plate so liquid can evaporate faster. Blot the surface with paper towels or a microfiber cloth.
For water spills:
Distilled water is relatively safe for electronics. Let the keyboard dry upside down for 48 to 72 hours in a well-ventilated area. A fan blowing across the board accelerates drying. After it is completely dry, test it before regular use.
For sugary drinks (soda, juice, coffee with sugar):
Sugar leaves a sticky residue that ruins switches over time. After the initial drain, you need to rinse the board. Use distilled water to gently flush the affected area. Some people use 99% isopropyl alcohol to displace water and speed drying. Let it dry for at least 72 hours before testing.
The rice myth:
You may have heard that putting a wet keyboard in a bag of rice helps dry it out. This is a myth. Rice does not absorb moisture fast enough to make a difference, and rice dust can get into your switches and make things worse. Use airflow from a fan instead.
When to seek professional help:
If you spilled a large amount of liquid or if the keyboard does not work after 72 hours of drying, you may need professional repair. Some custom keyboard builders offer ultrasonic cleaning services that can salvage heavily contaminated boards. For very expensive keyboards, this is worth exploring before replacing.
Troubleshooting Common Issues After Cleaning
Sometimes things go wrong during or after cleaning. Here are the most common problems and how to fix them.
Sticky keys after reassembly:
If a key feels sticky or sluggish after you put it back together, the keycap stem might not be fully seated. Remove the keycap and reattach it, pressing down firmly. If the switch itself feels sticky, there may be moisture inside. Let the keyboard dry for another few hours before testing again.
A key is not registering:
Check that the keycap is fully pressed onto the switch stem. If the stem is cracked or damaged, the keycap will not actuate the switch properly. Try the switch without the keycap by pressing the stem directly. If it still does not register, the switch may need replacement.
Switch feels different after cleaning:
If a switch feels scratchy or gritty, some dust may have gotten inside during cleaning. For hot-swappable keyboards, pull the switch and blow it out with compressed air. For soldered switches, try tapping the keyboard upside down to dislodge particles.
Rattling stabilizers:
If your spacebar or other stabilized keys rattle after cleaning, you may have disturbed the stabilizer lubrication. A small amount of dielectric grease on the stabilizer wire ends will usually fix this. Apply sparingly with a cotton swab or toothpick.
Keys feel mushy:
This usually means moisture is trapped in or around the switch. Give it more drying time. If the problem persists after 24 hours of additional drying, the switch may need replacement.
Maintenance Tips to Keep Your Keyboard Clean Longer
The best way to deal with a dirty keyboard is to prevent it from getting dirty in the first place. A few simple habits make a big difference.
Cleaning frequency guide:
I recommend a tiered approach to keyboard maintenance. Do a surface clean (brush and compressed air) once a week. This takes about 5 minutes and keeps dust from accumulating. Do a deeper surface clean with isopropyl alcohol wipes once a month. Plan a full deep clean with keycap removal every 2 to 3 months if you use your keyboard daily.
If you eat at your desk, increase the frequency. Food crumbs are the biggest contributor to keyboard grime.
Use a keyboard cover:
A dust cover or keyboard skin prevents dust from settling on your keyboard when it is not in use. Cloth dust covers are inexpensive and effective. Silicone keyboard skins protect against spills but change the typing feel, so use them when the keyboard is idle rather than while typing.
Wash your hands:
This sounds obvious, but finger oils are the primary cause of shiny, greasy keycaps. Washing your hands before typing, especially after eating, dramatically reduces oil transfer. This single habit extends the life of your keycaps significantly.
Keep a brush at your desk:
Keep a soft brush next to your keyboard and give it a quick sweep every few days. This takes 30 seconds and prevents dust from building up to the point where you need a deep clean.
Never use standard WD40 on your keyboard:
Standard WD40 is a multi-purpose spray that is not designed for electronics. It leaves an oily residue that attracts dust and can damage switch components. If you need switch lubricant, use a dedicated product like Krytox 205g0 or dielectric grease for stabilizers. These are formulated for mechanical keyboard use.
Keep drinks away from your keyboard:
The easiest way to avoid spill damage is to keep liquids at a safe distance. A separate drink holder or a desk with a raised monitor platform keeps your keyboard away from accidental spills. If you must drink while typing, use a sealed container like a water bottle with a cap.
Frequently Asked Questions
Can I use 70% alcohol to clean my keyboard?
Yes, 70% isopropyl alcohol is safe and effective for cleaning a mechanical keyboard. Apply it to a microfiber cloth or cotton swab rather than spraying directly on the board. The 70% concentration has enough water to dissolve grime while still evaporating reasonably quickly. Avoid concentrations below 70% as they contain too much water and dry too slowly for electronics.
Can I use WD40 to clean a mechanical keyboard?
No, do not use standard WD40 on a mechanical keyboard. It leaves an oily residue that attracts dust and can damage switch components over time. If you need lubricant for switches or stabilizers, use products designed for keyboards such as Krytox 205g0 for switches or dielectric grease for stabilizer wires.
Can I pop the keys off my keyboard to clean?
Yes, you can and should remove keycaps for a proper deep clean. Use a keycap puller to pull each keycap straight up with steady pressure. Be gentle with larger stabilized keys like the spacebar, Shift, and Enter. If you do not have a puller, a bent paperclip can work as a substitute. Always take a reference photo before removing keys.
Can you wash mechanical keyboard keycaps in the dishwasher?
No, the dishwasher is not recommended for keycaps. The high heat can warp thin ABS plastic keycaps, and dishwasher detergent is too harsh for most keycap materials. Instead, soak keycaps in warm soapy water or use denture cleaning tablets for 30 minutes, then scrub gently with a soft brush and rinse by hand.
How often should I clean my mechanical keyboard?
Do a quick surface clean with a brush and compressed air once a week. Perform a deeper wipe-down with isopropyl alcohol once a month. Plan a full deep clean with keycap removal every 2 to 3 months for daily-use keyboards. If you eat at your desk, clean more frequently to prevent food debris buildup.
Conclusion
Knowing how to clean a mechanical keyboard the right way keeps your board performing at its best and extends its life by years. The process comes down to removing keycaps, soaking them clean, using compressed air and isopropyl alcohol on the keyboard body, drying thoroughly, and reassembling.
Start with a surface clean this week and plan a full deep clean within the next month. Your keyboard will feel like new, and every keystroke will be crisper for it. A clean keyboard is a joy to type on, and maintaining one takes far less effort than most people expect.