
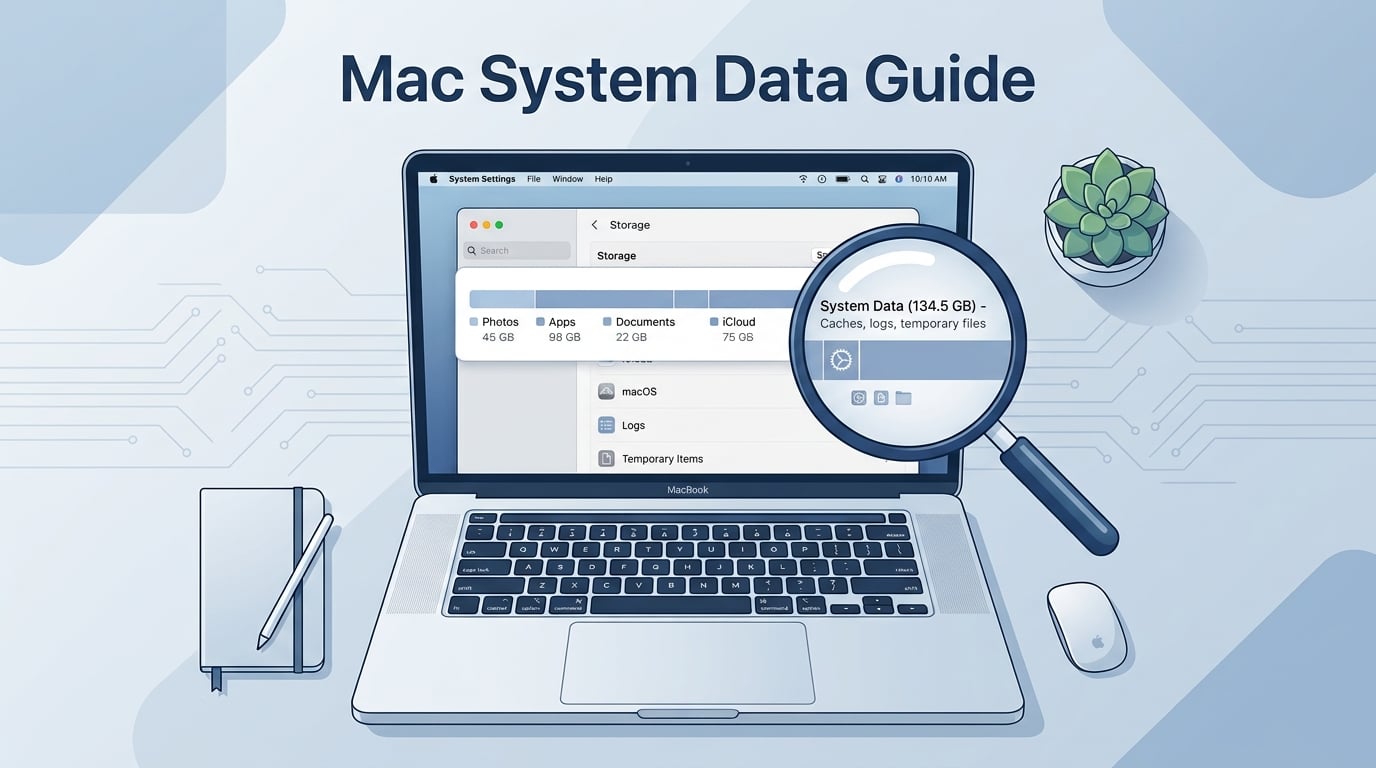
You open your Mac storage settings, expecting to see a few large apps and some movies eating up your SSD. Instead, you find a mysterious category called System Data sitting there at 80GB, 120GB, or sometimes even 200GB or more. You are not alone in this frustration.
System Data on a Mac is a catch-all storage category that Apple uses for caches, temporary files, logs, backups, and other system-level data that does not fit neatly into categories like Applications, Documents, or Photos. Understanding what System Data storage is on a Mac and how to clear it can free up significant disk space, sometimes 50GB or more in a single session.
In this guide, our team walks you through exactly what lives inside System Data, why it balloons to absurd sizes, and which methods actually work to shrink it in 2026. We have tested every approach here across multiple Macs running macOS Ventura, Sonoma, and Sequoia. Whether you have a 256GB MacBook Air or a maxed-out MacBook Pro, you will find actionable steps below.
One important thing upfront: System Data is not a single folder you can just drag to the Trash. It is a collection of dozens of different file types scattered across your Mac. That means clearing it requires a targeted approach, which is exactly what we lay out below.
What Is System Data on a Mac?
System Data is a macOS storage category that groups together files macOS needs to operate but does not classify as part of the core operating system, your applications, or your personal documents. Think of it as the backstage area of your Mac where temporary files, caches, backups, and logs accumulate over time.
Apple introduced the System Data label in macOS Monterey, replacing the older and even more confusing Other storage category. The renaming was meant to clarify things, but the underlying files remained just as opaque to most users. On macOS Ventura and later, this category appears in Storage Settings as a gray or dark bar segment.
Here is what typically lives inside System Data:
System and application caches — temporary files that help apps and macOS load faster, stored in locations like ~/Library/Caches and /Library/Caches
Time Machine local snapshots — automatic APFS snapshots that macOS creates when your Time Machine drive is disconnected
iOS and iPad backups — full device backups stored locally on your Mac via Finder
Log files — diagnostic and crash logs generated by macOS and third-party apps
DMG and PKG installers — disk images and installer packages left in your Downloads folder
Spotlight index files — the search index that macOS maintains, which can grow surprisingly large
Apple Intelligence model files — on-device AI models downloaded for macOS Sequoia and later (a growing concern in 2026)
Language files, fonts, and system extensions — supporting files for macOS features
Some of these files are measured in megabytes. Others, particularly Time Machine snapshots and iOS backups, can consume tens or even hundreds of gigabytes on their own. The Spotlight index has been reported to reach 400GB or more in extreme cases on Macs with massive file libraries.
It is also worth understanding that System Data lives inside your APFS container. macOS uses Apple File System, and APFS snapshots are a core feature that allows the system to track changes and enable rollbacks. These snapshots are invisible in Finder but take up real space inside the container. This is why your storage bar might show System Data at one size and then a different size after a reboot.
How to Check System Data Storage on Your Mac
Before clearing anything, you need to see exactly how much space System Data is consuming on your Mac. Here is how to find it.
Step 1: Click the Apple menu in the top-left corner of your screen.
Step 2: Select About This Mac, then click More Info (on macOS Ventura and later) or Storage (on older versions).
Step 3: Wait for macOS to calculate storage. This can take 30 seconds to several minutes depending on how many files you have. The bar will populate with color-coded segments.
Step 4: Look for the gray or dark segment labeled System Data. Hover over it to see the exact size in gigabytes.
If you see a number above 50GB, you likely have room to reclaim. Numbers above 100GB almost always indicate a specific culprit like Time Machine snapshots, old iOS backups, or an overgrown Spotlight index.
For a more detailed breakdown, you can also use third-party tools like Daisy Disk or OmniDiskSweeper to scan your drive and see exactly which folders are consuming space. We will cover some of these options later in this guide.
Why Is System Data So Large on Your Mac?
System Data does not grow large on its own without a reason. There is always a specific file type or system mechanism behind the bloat. Here are the most common culprits we have encountered across dozens of Macs.
Time Machine Local Snapshots
This is the number one cause of bloated System Data. When Time Machine is enabled but your backup drive is disconnected, macOS creates local APFS snapshots on your internal drive. These snapshots are supposed to be temporary, but they can accumulate and consume 50GB to 200GB or more.
macOS is designed to delete old snapshots automatically when you need space, but this does not always work reliably. Many users on Reddit and Apple Support Communities report snapshots persisting for weeks or months, eating into their available storage. If your System Data jumped suddenly, Time Machine snapshots are the first place to look.
Application and System Caches
Every app you use generates cache files. Browsers cache web pages, streaming apps cache video chunks, and creative apps like Final Cut Pro and Photoshop cache project previews. Over months and years, these caches grow into multi-gigabyte folders scattered across ~/Library/Caches and /Library/Caches.
System caches work the same way. macOS generates temporary files for system tasks, and while most are cleaned up automatically, some linger indefinitely. We have seen Macs with 15GB or more in nothing but old cache files.
Old iOS and iPad Backups
If you have ever plugged an iPhone or iPad into your Mac to back it up via Finder, those backups live on your internal drive. Each full backup can be 20GB to 80GB depending on the device. Multiple devices, multiple backups, and old backups from devices you no longer own add up fast.
These backups are stored in ~/Library/Application Support/MobileSync/Backup/. Most users have no idea this folder exists, which is why it goes unchecked for years.
DMG Files and Installer Packages
Every time you download an app as a DMG disk image or a PKG installer, that file stays in your Downloads folder unless you delete it. macOS counts these as System Data. We have seen Downloads folders with 20GB or more of old installers that served their purpose months or years ago.
Spotlight Index (the Hidden Giant)
Spotlight maintains a search index of every file on your Mac. On Macs with large file libraries, especially those used for video editing, photography, or software development, this index can grow to extraordinary sizes. MacPaw and several forum users have reported Spotlight indexes exceeding 400GB.
This is one of the least-covered causes of System Data bloat, and most guides skip it entirely. If you have tried everything else and your System Data is still massive, rebuilding the Spotlight index should be on your list.
Apple Intelligence Models
Starting with macOS Sequoia, Apple Intelligence downloads on-device AI models to your Mac. These models can consume several gigabytes of storage and are classified as System Data. As Apple expands its AI capabilities through 2026, this category is expected to grow. If you have a compatible Mac and Apple Intelligence enabled, this is a contributing factor to your System Data size.
Xcode Derived Data (for Developers)
If you develop apps using Xcode, the DerivedData folder can balloon to 10GB to 50GB or more. This folder contains intermediate build outputs, cached dependencies, and indexing data. Xcode does not clean this up automatically, so it grows indefinitely with every project you build.
Is It Safe to Delete System Data on a Mac?
The short answer is: it depends on which files you are deleting. Some System Data files are completely safe to remove, while others are critical to macOS operation and deleting them can cause serious problems.
Safe to delete:
Old iOS and iPad backups
DMG and PKG installer files
Application cache folders (apps will rebuild them as needed)
Time Machine local snapshots
Browser cache and temporary files
Xcode DerivedData (if you are a developer)
Old log files in ~/Library/Logs
Never delete:
Anything inside /System (this is the sealed, read-only system volume on modern macOS)
Files inside /Library that you do not recognize
System extensions or kernel extensions
Any file while an app is actively using it
Font files that macOS relies on
Our strongest recommendation: back up your Mac with Time Machine or a full clone before deleting anything. If you accidentally remove something important, you can restore it from your backup.
Also, never follow Terminal commands from unverified sources. Forum posts can contain outdated or malicious commands. Stick to the well-documented commands we share below, which are standard macOS utilities.
How to Clear System Data on a Mac: 8 Proven Methods
Now we get to the practical part. Here are eight methods to reduce System Data storage on your Mac, ranked roughly from most impactful to least. You may not need all of them. Start with the first two methods, as they address the most common causes of bloated System Data.
Method 1: Remove Time Machine Local Snapshots
This single method has freed up 100GB or more for many users. Time Machine local snapshots are the most common cause of suddenly large System Data.
Option A: Using Terminal (recommended)
Open Terminal from Applications > Utilities and run the following command to list all local snapshots:
tmutil listlocalsnapshots /
This will output a list of snapshots with names like com.apple.TimeMachine.2026-07-01-080000. To delete them, you can disable local snapshots temporarily:
tmutil disablelocal
On newer macOS versions, this command may not be available. Instead, you can delete individual snapshots with:
tmutil deletelocalsnapshots YYYY-MM-DD-HHMMSS
Replace the date-time string with the actual snapshot name from the list. Run this for each snapshot, or write a quick loop to delete them all.
Option B: Using Disk Utility (no Terminal required)
If you are not comfortable with Terminal, Disk Utility offers an alternative. Open Disk Utility, select your main drive, and look at the APFS snapshots by clicking the View menu and selecting Show APFS Snapshots. From there, you can select and delete snapshots manually.
After deleting snapshots, restart your Mac and check your storage again. The System Data bar should shrink significantly within a few minutes.
Method 2: Delete Old iOS and iPad Backups
Old device backups are pure waste if they come from devices you no longer own or have not updated in months. Here is how to remove them.
Through Finder (macOS Catalina and later):
Open Finder, connect or disconnect any iOS devices (it does not matter which), and click Finder > Settings (or Preferences) in the top menu bar. Go to the General tab and look at the list of device backups. Click any backup you no longer need and select Delete Backup.
Through the file system:
Navigate to ~/Library/Application Support/MobileSync/Backup/. Each folder here represents a device backup. You can safely delete any folder for a device you no longer need to restore. A single old iPhone backup can free up 30GB to 80GB instantly.
Remember that once you delete a backup, you cannot restore that device to that state. Make sure your current devices are being backed up to iCloud or an external drive before deleting local backups.
Method 3: Clear Application and System Caches
App caches are safe to delete because applications will simply rebuild them as needed. The performance hit is minimal, and the space savings can be significant.
To clear user caches:
Open Finder, press Command+Shift+G, and enter ~/Library/Caches. You will see folders for every application that stores cache data. You can safely delete the contents of these folders. Do not delete the folders themselves, just the files inside them.
Common large cache folders include com.apple.Safari, com.google.Chrome, com.spotify.client, and com.apple.mail. Streaming apps like Spotify and Apple Music can cache several gigabytes of audio data.
To clear system caches:
Navigate to /Library/Caches using the same Go to Folder command. Be more cautious here. Delete cache folders for third-party applications but leave system-level caches alone unless you know what they are.
After clearing caches, restart your Mac. Apps will take slightly longer to open the first time as they rebuild their cache files, but this normalizes within a day.
Method 4: Delete DMG Files and Installer Packages
This is the easiest method on the list. Open your Downloads folder and search for .dmg and .pkg files. Sort by size to find the largest installers.
Delete any installer for apps you have already installed. The DMG or PKG file is just the delivery mechanism. Once the app is installed, you do not need the installer anymore.
Most users find 5GB to 20GB of old installers in their Downloads folder. This is free space sitting right there, no Terminal or special tools required.
While you are in Downloads, take a moment to delete any other large files you no longer need: old videos, ZIP archives, and PDFs you downloaded once and forgot about.
Method 5: Clean Up the Downloads Folder Beyond Installers
Your Downloads folder is a goldmine of reclaimable space. Beyond DMG files, look for:
Large video files you watched once
ZIP and RAR archives you have already extracted
Duplicate downloads of the same file
Old presentation or project files transferred from colleagues
Screenshots that accumulated over months
A quick tip: sort your Downloads folder by Date Modified. Anything older than six months is a candidate for deletion unless you specifically remember needing it.
Method 6: Remove Xcode Derived Data (for Developers)
If you use Xcode, DerivedData is likely one of the largest folders on your Mac. You can safely delete the entire DerivedData folder and Xcode will rebuild it on your next build.
The folder is located at ~/Library/Developer/Xcode/DerivedData. Delete the entire folder contents. Your next build will take longer as Xcode recompiles everything, but you can reclaim 10GB to 50GB of space.
You can also clean up old simulator data at ~/Library/Developer/CoreSimulator/Devices. Each simulator device takes up space, and old ones you no longer test on can be removed.
Method 7: Clear Browser Caches
Web browsers accumulate cache files that count toward System Data. Each browser handles cache clearing differently.
Safari: Open Safari > Settings > Advanced and check Show features for web developers. Then go to Safari > Settings > Advanced > Show Develop menu, and select Develop > Empty Caches.
Chrome: Open Chrome > Settings > Privacy and security > Clear browsing data. Select Cached images and files and choose All time as the time range.
Firefox: Open Firefox > Settings > Privacy and Security > Cookies and Site Data > Clear Data. Check Cached Web Content and click Clear.
Browser caches are typically 1GB to 5GB, so this method alone will not free massive amounts of space. But combined with the other methods, it adds up.
Method 8: Rebuild the Spotlight Index
This is the method most guides skip, and it can yield dramatic results for some users. The Spotlight search index (Spotlight-V100) catalogs every file on your Mac, and on systems with large media libraries, it can grow to tens or even hundreds of gigabytes.
To rebuild the Spotlight index, open System Settings > Siri and Spotlight. Scroll down to Spotlight Privacy, then drag your main drive into the privacy list. This tells Spotlight to stop indexing that drive, effectively deleting the index.
Wait a few minutes, then remove the drive from the privacy list. Spotlight will rebuild the index from scratch, which takes time but results in a fresh, smaller index.
Alternatively, you can use Terminal:
sudo mdutil -E /
This erases and rebuilds the Spotlight index for your root drive. The process runs in the background and can take several hours on large drives. During this time, Spotlight search may return incomplete results.
For users who have exhausted all other methods and still see massive System Data, this is often the missing piece. Forum reports indicate Spotlight index sizes of 50GB to 400GB on Macs used for professional video editing or software development.
What to Do When System Data Won’t Decrease
One of the most frustrating experiences is spending an hour clearing caches and deleting files, only to find that System Data has not budged. This is a common complaint on Reddit and Apple Support Communities.
Here is what to try when standard cleanup methods do not work.
Restart your Mac. This sounds too simple, but it works surprisingly often. macOS performs cleanup tasks during shutdown and startup, including deleting expired APFS snapshots and temporary files. A restart can free up several gigabytes instantly.
Boot into Safe Mode. Hold Shift during startup to boot into Safe Mode. Safe Mode prevents certain extensions and login items from loading, and macOS performs additional disk maintenance in this mode. Restart normally afterward and check your storage.
Run Disk Utility First Aid. Open Disk Utility, select your drive, and click First Aid. This checks for and repairs disk errors that might be preventing macOS from reclaiming space. It also cleans up orphaned APFS structures.
Check for APFS snapshot persistence. Some snapshots refuse to delete through normal methods. Use tmutil listlocalsnapshots / to verify they are actually gone. If they persist, try the tmutil thinlocalsnapshots command, which forces macOS to thin snapshots to a target size:
tmutil thinlocalsnapshots / 10000000000 1
This tells macOS to thin local snapshots to approximately 10GB. Adjust the number as needed.
Consider a clean macOS install. If nothing else works and your System Data is still unreasonably large, a clean install of macOS is the nuclear option. Back up your data, erase your drive, and install a fresh copy of macOS. This guarantees every scrap of accumulated junk is gone. It is time-consuming but effective, and many users report reclaiming 50GB to 100GB compared to their previous setup.
Apple Intelligence and AI Model Storage Impact
With the introduction of Apple Intelligence in macOS Sequoia, Macs with Apple Silicon (M1 and later) now download on-device AI models. These models power features like text rewriting, image generation, Siri enhancements, and notification summaries.
These model files are stored as part of System Data and can consume several gigabytes. As Apple continues to expand AI features through 2026, this storage footprint is expected to grow.
Currently, there is no user-facing setting to remove Apple Intelligence models specifically. If you disable Apple Intelligence in System Settings > Apple Intelligence and Siri, some model data may be cleaned up, but Apple has not provided full transparency on how much space these models occupy or how to remove them manually.
If you are working with a 256GB MacBook Air and every gigabyte counts, disabling Apple Intelligence and monitoring your System Data over the following days is worth trying. You can always re-enable it later.
How to Keep System Data Under Control
Clearing System Data once is not a permanent fix. Without ongoing maintenance, the same files will accumulate again. Here are our recommendations for keeping System Data manageable.
Check storage monthly. Make it a habit to open Storage Settings once a month. If you catch System Data growth early, it is easier to address before it becomes a 100GB problem.
Manage Time Machine snapshots proactively. If you use Time Machine with a portable drive, connect the drive regularly so snapshots can be offloaded. If you go weeks without connecting it, local snapshots will accumulate.
Clean your Downloads folder weekly. The Downloads folder is where most junk accumulates. Delete installers after use and archive important downloads to a different location.
Use built-in storage management tools. macOS includes a Storage Management tool (Apple menu > About This Mac > Storage > Manage on older macOS, or Settings > General > Storage on newer versions). This tool recommends files to delete, identifies large files, and can automatically remove watched Apple TV movies.
Restart your Mac regularly. Users who never shut down their Macs miss out on the cleanup tasks that happen during startup and shutdown. A weekly restart keeps temporary files from piling up.
Clear caches quarterly. Set a reminder every three months to clear ~/Library/Caches. This prevents cache folders from growing unchecked over the long term.
FAQs
What can I delete to clear up System Data on a Mac?
You can safely delete old iOS backups, Time Machine local snapshots, DMG and PKG installer files, application cache folders in ~/Library/Caches, browser caches, old log files, and Xcode DerivedData if you are a developer. Never delete files inside /System or unverified files in /Library, as these are critical to macOS operation.
Why is System Data using up so much storage on my Mac?
System Data grows large primarily because of Time Machine local snapshots, which can consume 50GB to 200GB when your backup drive is disconnected. Other major contributors include old iOS backups (20GB to 80GB each), accumulated application and system caches, DMG installer files, an overgrown Spotlight index (up to 400GB in extreme cases), and Apple Intelligence model files on macOS Sequoia and later.
Why do I have over 100GB of System Data on my Mac?
Having over 100GB of System Data usually points to one or more specific culprits: Time Machine local snapshots that failed to auto-delete, multiple old iOS device backups stored locally, large application caches from streaming or creative apps, an oversized Spotlight search index, or accumulated Xcode build data for developers. Running tmutil listlocalsnapshots in Terminal helps identify if snapshots are the cause.
Why is my Apple system data so high?
Apple system data is high because macOS accumulates caches, temporary files, local snapshots, and backups over time without always cleaning them up automatically. Starting with macOS Sequoia, Apple Intelligence AI models also add several gigabytes. If your system data is unexpectedly high, Time Machine local snapshots and old iOS backups are the most likely causes.
How do I clear System Data on Mac using Terminal?
Use tmutil listlocalsnapshots / to list local snapshots, then tmutil deletelocalsnapshots followed by the snapshot date to delete individual ones. To force thin snapshots, run tmutil thinlocalsnapshots / 10000000000 1. To rebuild the Spotlight index, run sudo mdutil -E /. Always back up your Mac before running Terminal commands.
Does resetting Mac remove System Data?
Yes, a factory reset or clean macOS install removes all System Data accumulated on your Mac. After erasing your drive and reinstalling macOS, System Data starts fresh at its baseline size, typically 10GB to 20GB. This is the most thorough but also the most time-consuming method of clearing System Data, and you should back up all personal files beforehand.
Wrapping Up: Taking Control of System Data on Your Mac
Understanding what System Data storage is on a Mac and how to clear it puts you back in control of your disk space. The biggest wins almost always come from removing Time Machine local snapshots and old iOS backups, which together account for the majority of cases where System Data exceeds 100GB.
Caches, DMG files, and browser data add another layer of reclaimable space. For users with especially large System Data that resists normal cleanup, rebuilding the Spotlight index and considering a clean macOS install are powerful last-resort options.
Start with the methods in this guide, back up your Mac first, and check your storage bar after each step. You will likely be surprised at how much space you can reclaim without spending a dime on third-party cleanup tools.