
Slow internet can ruin your entire day. You pay for high-speed broadband, your signal bars look perfect, and yet pages crawl, video calls freeze, and downloads stall at the worst possible moment. If this sounds familiar, the problem might not be your internet plan at all. It could be Wi-Fi channel interference from the dozens of networks broadcasting around you.
Every router nearby competes for the same limited wireless space. When too many networks share the same channel, data packets collide, devices get confused, and your connection speed tanks. The good news is that you can fix this yourself in about ten minutes without buying any new equipment.
In this guide, I will walk you through exactly how to change your Wi-Fi channel to reduce interference. I will cover what channels are, which ones work best on each frequency band, how to use free analyzer apps to find the clearest channel, and step-by-step instructions for popular router brands. By the end, you will have the knowledge to squeeze every bit of speed out of your current setup.
What Are Wi-Fi Channels and Why They Matter
Wi-Fi channels are specific frequency ranges within a larger band that your router uses to send and receive data. Think of a band like a highway and channels like individual lanes on that highway. When too many cars pile into one lane, traffic slows to a crawl. The same thing happens to your Wi-Fi when neighboring networks crowd the same channel.
The 2.4 GHz band is divided into 14 channels (though only 11 are legally available in the United States). Each channel is 5 MHz apart, but Wi-Fi signals are much wider than 5 MHz. A standard 20 MHz Wi-Fi signal actually spills over into adjacent channels, which is why picking the right channel matters so much.
Channel selection directly impacts your network speed, stability, and range. When your router broadcasts on a congested channel, it has to constantly wait for other networks to finish transmitting before sending its own data. This creates latency, reduces throughput, and causes those frustrating random disconnections during important tasks.
Understanding 2.4 GHz vs 5 GHz vs 6 GHz Bands
Modern routers typically support at least two frequency bands, and newer models add a third. Each band has distinct characteristics that affect performance, range, and interference levels. Understanding these differences is the first step toward making smart channel decisions.
The 2.4 GHz Band
The 2.4 GHz band is the oldest and most widely used Wi-Fi frequency. It offers excellent range and penetrates walls and floors better than higher frequencies. This makes it ideal for covering large homes and connecting IoT devices like smart plugs, doorbell cameras, and older laptops.
The trade-off is that 2.4 GHz is incredibly crowded. Every older router, Bluetooth device, microwave oven, baby monitor, and cordless phone operates in or near this band. If you live in an apartment building or a dense neighborhood, the 2.4 GHz spectrum is likely packed with competing signals.
The 5 GHz Band
The 5 GHz band offers significantly faster speeds and many more channels than 2.4 GHz. It is the band of choice for streaming 4K video, online gaming, and large file transfers. Because 5 GHz has more room to work with and fewer competing devices, interference is generally much lower.
The downside is range. 5 GHz signals attenuate faster and struggle more with walls and obstacles. You might get blazing speeds in the same room as your router but notice a steep drop-off as you move further away or go upstairs.
The 6 GHz Band (Wi-Fi 6E and Wi-Fi 7)
If you have a Wi-Fi 6E or Wi-Fi 7 router and a compatible device, you get access to the 6 GHz band. This is the newest Wi-Fi frequency and offers the most channels and the least interference. Since relatively few devices currently use 6 GHz, the band is wide open in most locations.
The 6 GHz band supports channel widths up to 160 MHz or even 320 MHz on Wi-Fi 7, enabling extremely fast throughput. Range is even shorter than 5 GHz, so it works best when your devices are relatively close to the router.
Non-Overlapping Channels Explained
Channel overlap is the core problem behind most Wi-Fi interference on the 2.4 GHz band. Because each channel center frequency is only 5 MHz apart but a standard Wi-Fi signal occupies 20 MHz of spectrum, adjacent channels bleed into each other significantly.
This means that if your router is on channel 3 and your neighbor is on channel 5, your signals overlap and interfere with each other. The overlap creates what engineers call adjacent channel interference, which is actually worse than two networks sharing the same channel. At least on the same channel, routers can take turns using a system called CSMA/CA.
The Magic Channels: 1, 6, and 11
On the 2.4 GHz band, only three channels do not overlap with each other at a 20 MHz width: channels 1, 6, and 11. These are called non-overlapping channels, and they are the only channels you should ever consider using on 2.4 GHz.
By sticking to 1, 6, or 11, you ensure that your network does not bleed into another network’s space. Even if your neighbor uses channel 6 and you also pick channel 6, you both experience co-channel interference, which is manageable. The routers share the airtime fairly. But if you pick channel 4 and your neighbor is on channel 6, you both get terrible performance because of adjacent channel interference.
On the 5 GHz band, channel overlap is much less of a problem. The channels are spaced far enough apart that they do not bleed into each other at standard 20 MHz and 40 MHz widths. This gives you many more clean channel options.
Best Channels for Each Band
Choosing the best channel depends on your specific environment, but there are reliable starting points for each band that work well in most situations.
Best 2.4 GHz Channels
Always choose from channels 1, 6, or 11 on the 2.4 GHz band. No exceptions. Picking any other channel means overlapping with these three and creating worse interference for everyone, including yourself. Use a Wi-Fi analyzer app to see which of these three channels has the fewest competing networks and pick that one.
Best 5 GHz Channels
The 5 GHz band offers over 20 channels in most regions. The non-DFS channels (36, 40, 44, and 48) are available to all devices without restrictions. Channels 149, 153, 157, and 161 are also widely available and often less congested. DFS channels (52 through 144) can be excellent choices but come with some caveats that I cover in the DFS section below.
For most home users, channel 44 or channel 149 is a solid default for 5 GHz. These channels tend to have fewer competing networks in residential areas.
Best 6 GHz Channels
If you have a 6 GHz capable router, any channel works well since the band is still lightly used. Channels 5, 21, 37, 53, 69, 85, and 101 are preferred channels in the standard 80 MHz width. Your router’s automatic channel selection handles 6 GHz well because congestion is minimal.
How to Change Your Wi-Fi Channel to Reduce Interference
Changing your Wi-Fi channel is a straightforward process, but the exact steps vary slightly depending on your router brand. The general approach is the same across all routers: access the admin panel, find the wireless settings, and change the channel. Here is how to do it step by step.
Step 1: Find Your Router’s IP Address
Most routers use 192.168.1.1, 192.168.0.1, or 10.0.0.1 as their admin IP address. On Windows, open Command Prompt and type ipconfig. Look for the Default Gateway entry under your active network adapter. On Mac, go to System Settings, click Network, select your connection, and click Details to find the router address. On mobile devices, check your Wi-Fi network details in Settings.
Step 2: Log Into Your Router Admin Panel
Open a web browser and type your router’s IP address into the address bar. You will see a login page prompting for a username and password. If you never changed these from the defaults, check the sticker on the bottom or back of your router. Common default usernames are admin and common default passwords are admin, password, or a unique password printed on the router label.
If you changed the password and cannot remember it, you may need to factory reset your router by holding the reset button for 10 seconds. This erases all custom settings, so only do this as a last resort.
Step 3: Navigate to Wireless Settings
The exact menu layout varies by brand, but here is where to look on the most common routers:
Netgear: Go to Settings, then Wireless Setup, or Advanced, then Wireless Settings. Look for a Channel dropdown menu.
TP-Link: Navigate to Advanced, then Wireless, then Wireless Settings. You will see separate channel options for 2.4 GHz and 5 GHz bands.
Asus: Go to Wireless, then General. The Channel dropdown is on the same page as your network name and security settings.
Linksys: Click on Connectivity, then the Wireless tab. Select Edit for each band to access channel settings.
Google Nest Wi-Fi: Open the Google Home app, tap your device, then Settings, then Wi-Fi, then the specific network to find channel options.
Step 4: Change From Auto to Manual Channel
Most routers ship with the channel set to Auto, which means the router picks a channel on its own. While modern routers with Auto selection are generally decent at this, manual selection gives you more control.
From the channel dropdown menu, select the channel you identified using a Wi-Fi analyzer app (covered in the next section). Do the same for both the 2.4 GHz and 5 GHz bands if your router is dual-band. Save your settings and wait for the router to restart the wireless radio, which typically takes 30 to 60 seconds.
Step 5: Test Your Connection
After the router comes back online, run a speed test on your devices. Try loading several websites, streaming a video, and running a video call. Walk around your home to check coverage in different rooms. If the new channel works better, you are done. If not, try the next best channel from your analyzer results.
I recommend rechecking your channels every few months, especially if you live in a dense area. New neighbors move in, new routers get installed, and the interference landscape changes constantly.
How to Use Wi-Fi Analyzer Apps to Find the Best Channel
Guessing which channel is best is like throwing darts blindfolded. A Wi-Fi analyzer app shows you exactly which channels are crowded and which are clear, taking all the guesswork out of the process. These apps scan the air around you and display every network within range, along with the channel each one uses and its signal strength.
Best Wi-Fi Analyzer Apps for Android
WiFi Analyzer (open-source): A free, ad-free app that shows a clear graph of all nearby networks and their channels. It recommends the best channel for your network based on congestion data. This is my go-to recommendation for Android users.
NetSpot: A more comprehensive tool that includes a visual heatmap feature for mapping signal strength throughout your space. The free version covers basic channel analysis well.
Best Wi-Fi Analyzer Apps for iPhone and iPad
Apple’s iOS restrictions prevent apps from scanning Wi-Fi networks the same way Android apps do, so options are more limited on iPhone. Network Analyzer by Techet and WiFi SweetSpots are two solid choices that work within Apple’s limitations to give you useful signal data.
Best Wi-Fi Analyzer Tools for Windows and Mac
On Windows, Wi-Fi Analyzer from the Microsoft Store is excellent and free. On Mac, NetSpot or the built-in Wireless Diagnostics tool (hold Option and click the Wi-Fi icon, then Open Wireless Diagnostics) provide detailed channel information.
How to Read Analyzer Results
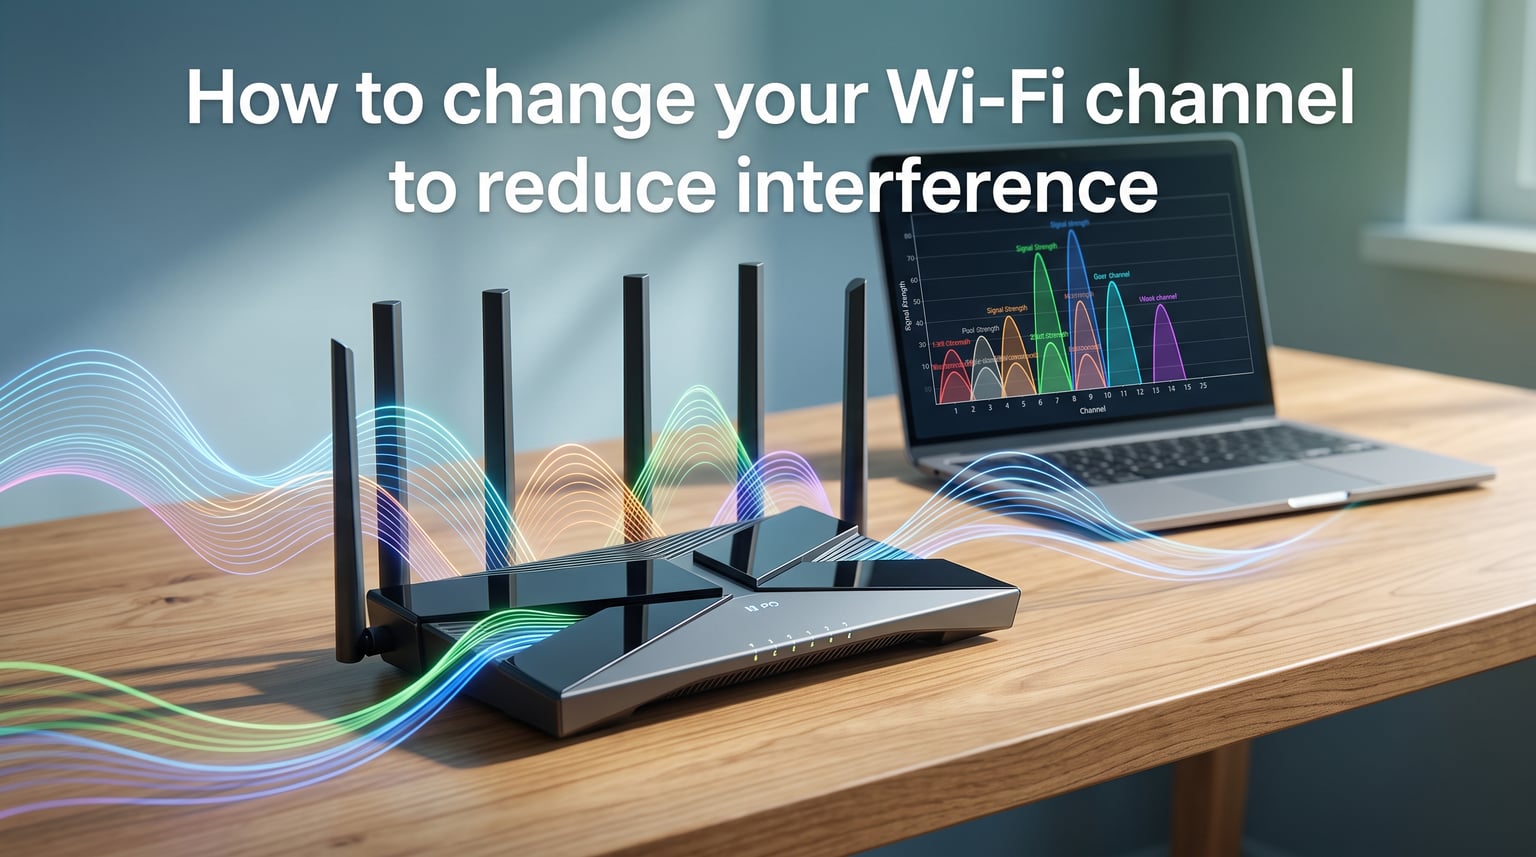
When you open your analyzer app, you will see a graph with channels on the horizontal axis and signal strength on the vertical axis. Each nearby network appears as a curved line or bar over its active channel. Taller bars mean stronger signals, which means more interference potential.
Look for the channel where the fewest networks appear, especially networks with strong signals. That is your target channel. On 2.4 GHz, narrow your search to only channels 1, 6, and 11. On 5 GHz, any channel with minimal activity is a good choice.
Some analyzer apps display a star rating or recommendation for each channel, making the decision even easier. If your app shows channel 11 with a 5-star rating and channel 6 with 2 stars, channel 11 is your best bet.
Understanding Channel Width Settings
Channel width controls how much spectrum your router uses for its Wi-Fi signal. Wider channels can carry more data, which means faster speeds. But wider channels also take up more space and are more likely to overlap with neighboring networks, creating more interference.
Think of channel width like a pipe diameter. A wider pipe can move more water, but it takes up more wall space. If you cram too many wide pipes into a small wall, they overlap and nothing flows properly.
Recommended Channel Width for 2.4 GHz
On the 2.4 GHz band, always use 20 MHz channel width. This is non-negotiable. Using 40 MHz on 2.4 GHz eats up two-thirds of the entire available spectrum, making it impossible to avoid overlapping with other networks. I have seen users set 40 MHz hoping for faster speeds, only to get worse performance because of the massive interference.
The only exception is if you live in a truly isolated area with zero neighboring Wi-Fi networks within range. In that case, 40 MHz on 2.4 GHz can deliver a speed boost. For everyone else, stick with 20 MHz.
Recommended Channel Width for 5 GHz
The 5 GHz band has enough room for wider channels. A 40 MHz width is a good default that balances speed and interference. If you live in a less congested area and need maximum throughput, 80 MHz works well. Some routers support 160 MHz on 5 GHz, which is extremely fast but covers so much spectrum that interference becomes likely in most neighborhoods.
For gaming and video calls, I recommend 40 MHz on 5 GHz for the best balance of speed and stability. For pure file transfer speed in a low-interference environment, try 80 MHz and run speed tests to compare.
Auto Channel Width
Some routers offer an Auto option for channel width. With modern routers from reputable brands, Auto works reasonably well. The router dynamically adjusts based on current interference. However, if you are experiencing problems, manually setting 20 MHz on 2.4 GHz is always the safer choice.
DFS Channels on 5 GHz Explained
Dynamic Frequency Selection, or DFS, is a regulatory requirement that allows Wi-Fi to share the 5 GHz spectrum with radar systems used by airports, weather stations, and military installations. DFS channels include 52, 56, 60, 64, 100, 104, 108, 112, 116, 120, 124, 128, 132, 136, 140, and 144.
The benefit of DFS channels is that they are significantly less congested. Many consumer devices do not support DFS, and many routers default to non-DFS channels. This means DFS channels are often wide open with zero competing networks, giving you a clear highway for your data.
The catch is that your router must continuously monitor for radar signals on DFS channels. If it detects radar, it is legally required to immediately vacate the channel. This means your router will switch channels without warning, causing all connected devices to briefly disconnect and reconnect.
If you live near an airport, military base, or weather radar station, you may experience frequent DFS channel changes. For most residential users, DFS channels work reliably and are worth trying. If you experience random disconnections after enabling DFS channels, switch back to non-DFS channels (36, 40, 44, 48, 149, 153, 157, 161).
Common Wi-Fi Interference Sources
Changing your channel is powerful, but it is only part of the equation. Many household devices and environmental factors create Wi-Fi interference that no channel change can fix. Knowing what to look for helps you address problems at their source.
Neighboring Wi-Fi Networks
The most common interference source is other Wi-Fi networks. In apartments, condos, and dense neighborhoods, you might see 20 or more networks competing for the same 2.4 GHz channels. This is the primary reason channel optimization matters so much.
Microwave Ovens
Microwave ovens operate at roughly 2.45 GHz, which falls right in the middle of the 2.4 GHz Wi-Fi band. When your microwave runs, it leaks small amounts of radiation that can disrupt Wi-Fi on channels 6 through 11. If your Wi-Fi drops every time someone heats up lunch, this is why. Moving your router away from the kitchen or switching to the 5 GHz band solves this problem.
Bluetooth Devices
Bluetooth also operates in the 2.4 GHz band, using a frequency-hopping technique that constantly jumps between channels. While Bluetooth’s low power means it usually causes only minor interference, having many active Bluetooth devices near your router can add up. Keep Bluetooth speakers, headphones, and smartwatches away from your router when possible.
Other Household Electronics
Baby monitors, cordless phones, wireless security cameras, and even some LED light controllers can generate interference in Wi-Fi bands. If you notice patterned interference at certain times of day, investigate what electronic devices are running during those windows.
Physical Obstacles
Walls, floors, metal surfaces, large appliances, and even water-filled objects like aquariums absorb or reflect Wi-Fi signals. A solid brick or concrete wall can cut signal strength by 50 percent or more. While this is not technically channel interference, it exacerbates the problem by weakening your signal to the point where interference tips it over the edge into unusability.
Troubleshooting: What to Do When Changing Channels Does Not Help
Sometimes you change your channel and nothing improves. Maybe speeds are still slow, or disconnections persist. Here is a systematic troubleshooting approach to identify and fix stubborn Wi-Fi problems.
Step 1: Verify the Channel Actually Changed
Some routers, especially ISP-provided combination modem/router units, appear to save settings but revert to defaults. Open your Wi-Fi analyzer app again and confirm that your network is actually broadcasting on the channel you selected. If it reverted, your router may have a firmware bug or your ISP may be overriding your settings remotely.
Step 2: Test on 5 GHz Exclusively
If your 2.4 GHz connection is irreparably congested, switch your devices to the 5 GHz band. Most modern devices support 5 GHz, and the reduced interference alone can solve your problem. If your router uses a combined network name, separate the 2.4 GHz and 5 GHz networks into different SSIDs so you can force devices onto the less congested band.
Step 3: Optimize Router Placement
Router placement matters as much as channel selection. Place your router in a central, elevated location, away from walls and large metal objects. Keep it off the floor and away from other electronics. A router buried in a closet behind a metal door will underperform regardless of which channel you choose.
Step 4: Check for ISP Issues
If your Wi-Fi is fine but your internet is still slow, the problem might be upstream. Connect a computer directly to your router with an Ethernet cable and run a speed test. If wired speeds are also slow, the issue is with your ISP connection, not your Wi-Fi. Contact your ISP to report the problem.
Step 5: Consider Hardware Upgrades
If your router is more than five years old, it may simply lack the processing power and antenna technology to handle modern network demands. Upgrading to a Wi-Fi 6 or Wi-Fi 7 router can dramatically improve performance, especially in dense environments. A mesh system with multiple access points can also solve coverage problems that a single router cannot.
Step 6: Handle ISP-Locked Routers
Many internet providers give customers modem/router combos with locked-down settings that prevent channel changes. If your ISP-provided router does not let you change channels, you have two options. First, call your ISP and ask them to change the channel remotely. Many providers will do this without argument. Second, request bridge mode on the ISP device and connect your own router, giving you full control over all wireless settings.
Frequently Asked Questions
How to reduce Wi-Fi channel interference?
To reduce Wi-Fi channel interference, follow these steps: 1) Download a Wi-Fi analyzer app to see which channels are congested in your area. 2) Log into your router admin panel using your router IP address. 3) Change from Auto to manual channel selection. 4) On 2.4 GHz, choose channel 1, 6, or 11, whichever has the fewest neighboring networks. 5) On 5 GHz, choose a channel with minimal activity. 6) Set 2.4 GHz channel width to 20 MHz. 7) Save settings and test your connection with a speed test.
Which channel width is better 20 or 40 MHz or auto?
For 2.4 GHz, 20 MHz is always the best choice because 40 MHz takes up too much spectrum and creates severe overlap with neighboring networks. For 5 GHz, 40 MHz is a good default for most homes, while 80 MHz can deliver faster speeds in less congested areas. Auto channel width works well on modern routers, but manually setting 20 MHz on 2.4 GHz eliminates the risk of the router selecting a problematic 40 MHz width.
What 5GHz channels avoid interference?
The best 5 GHz channels to avoid interference are the non-DFS channels 36, 40, 44, and 48, plus the higher channels 149, 153, 157, and 161. DFS channels (52 through 144) often have less congestion because many consumer devices do not support them, but they carry a risk of random disconnections if radar is detected. Channel 44 or channel 149 are solid defaults for most residential environments.
What should I change my Wi-Fi channel to?
On 2.4 GHz, always choose channel 1, 6, or 11, since these are the only non-overlapping channels. Use a Wi-Fi analyzer app to pick whichever of these three has the fewest competing networks with strong signals. On 5 GHz, choose any channel with low activity in your area; channels 44 and 149 are reliable starting points. If you have a 6 GHz router with Wi-Fi 6E or Wi-Fi 7, any channel works well since the band is largely uncongested.
Conclusion
Learning how to change your Wi-Fi channel to reduce interference is one of the highest-impact things you can do for your home network. By selecting non-overlapping channels on 2.4 GHz, choosing clear channels on 5 GHz, setting the right channel widths, and using analyzer apps to make informed decisions, you can dramatically improve your Wi-Fi performance without spending a dime.
Remember to start with a Wi-Fi analyzer scan, pick from channels 1, 6, or 11 on the 2.4 GHz band, keep your channel width at 20 MHz for 2.4 GHz, and test thoroughly after making changes. If channel optimization alone does not solve your problems, consider router placement improvements, hardware upgrades, or contacting your ISP about locked settings. A clear channel is the foundation of a fast, stable, and reliable Wi-Fi connection.